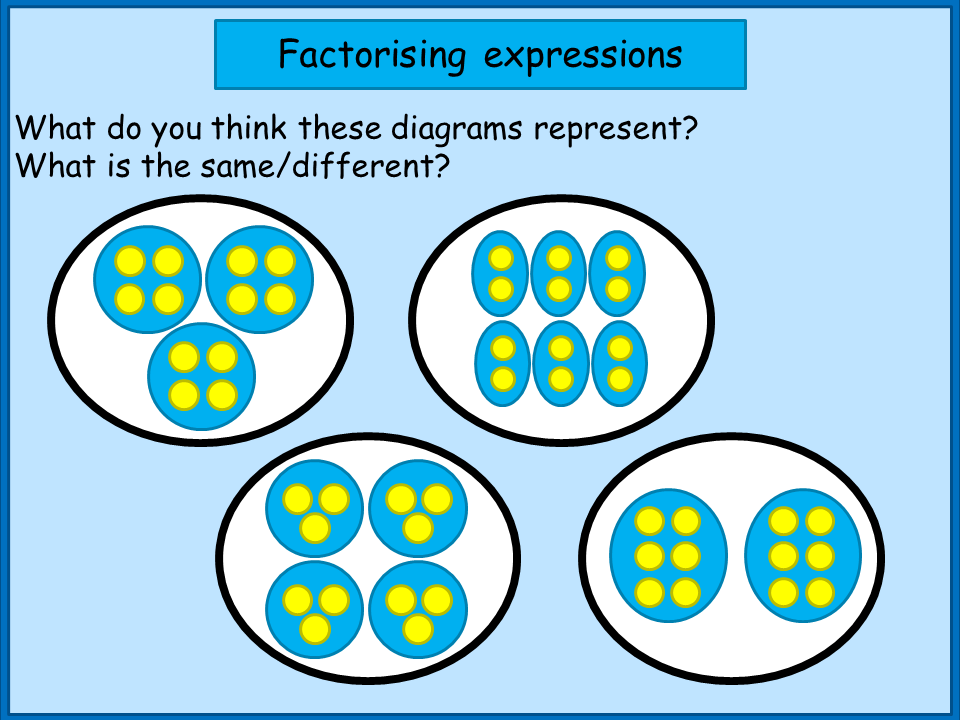
I usually start work on factorising algebraic expressions with a critical look at what factorising actually is and a few reminders of prior learning about factors. I pop up this diagram when pupils enter the classroom, and get them to think about what it is showing. We then have a discussion and collect ideas. The slide represents factors of 12, with different ways of grouping the factors. I remind the class what “factor” means, and ask them to explain how they can see factor pairs of 12 in the diagram. It’s good to link with ideas about division/grouping/sharing (e.g. the first diagram shows 12 as 3 groups of 4, so this is the same as 12 shared into 3 equal groups, or 12 ÷ 3).
I sometimes ask the class to draw representations of other numbers in a similar way. Suggested numbers: 10, 30, 16 (odd number of groupings because it is a square number), some small primes.
I then give each pair a set of algebra tiles, and ask them to work out/draw different ways to group 6x + 12. I emphasise the idea of sharing into equal groups, so each group should contain the same number of x tiles and 1 tiles, linking into our discussion about division earlier.
We then collect ideas as a class; it is very effective at this point to select pupils to demonstrate their ideas on the whiteboard at the front, especially if pupils have come up with different notation to represent groupings. Some pupils spontaneously use bracket notation to simplify their pictures, but if they haven’t, I push them towards this idea.
We compare two representations, such as 3(2x + 4) and 6(x + 2) and discuss which they think is more simple, pushing towards the idea that, when factorising, we make the groupings inside brackets as small/simple as possible.
I then get them to do some problems; if you download the resource, I’ve selected three sets of questions, red being the easiest and green the hardest. Pupils may wish to work through all three. I would discourage pupils from starting at the green problems straight away, as these involve using negative tiles. Pupils could do this in pairs using mini-whiteboards, or write/draw solutions in their books. If you make up your own questions, keep the numbers small to avoid too much fiddling and counting, and avoid removing a negative number as a factor.
When pupils are ready (and this is sometimes in the next lesson) we discuss how we can “spot” the groupings to choose without drawing diagrams each time – by looking for the largest common factor of both terms.