manipulatives

Expanding single brackets using algebra tiles
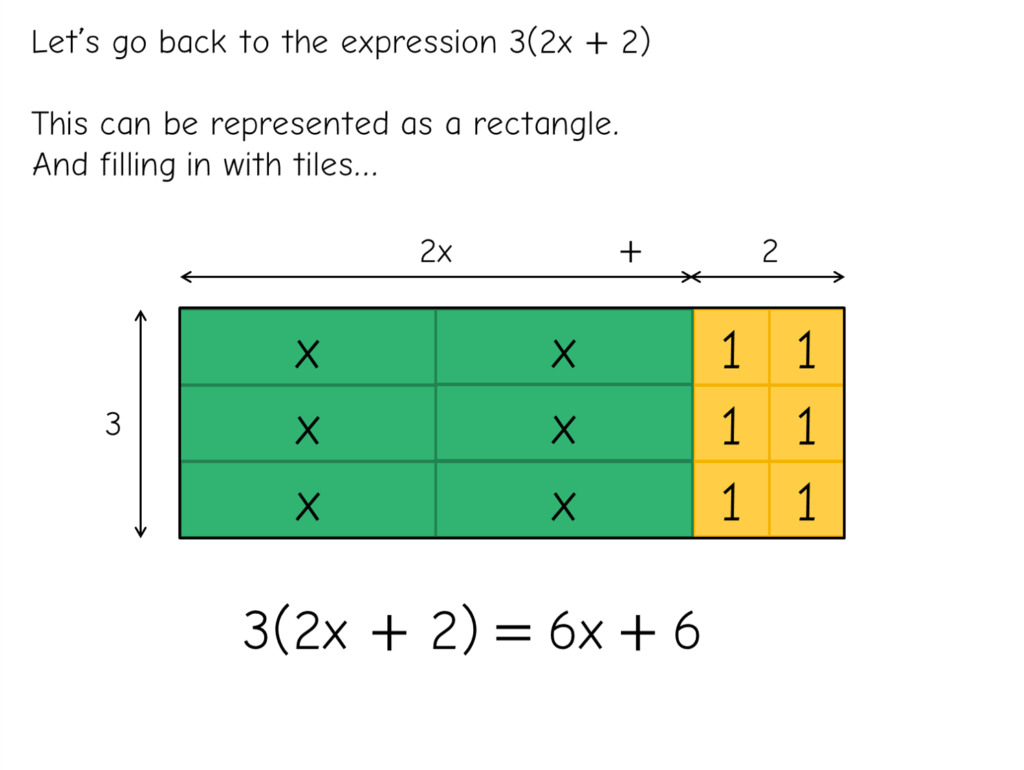
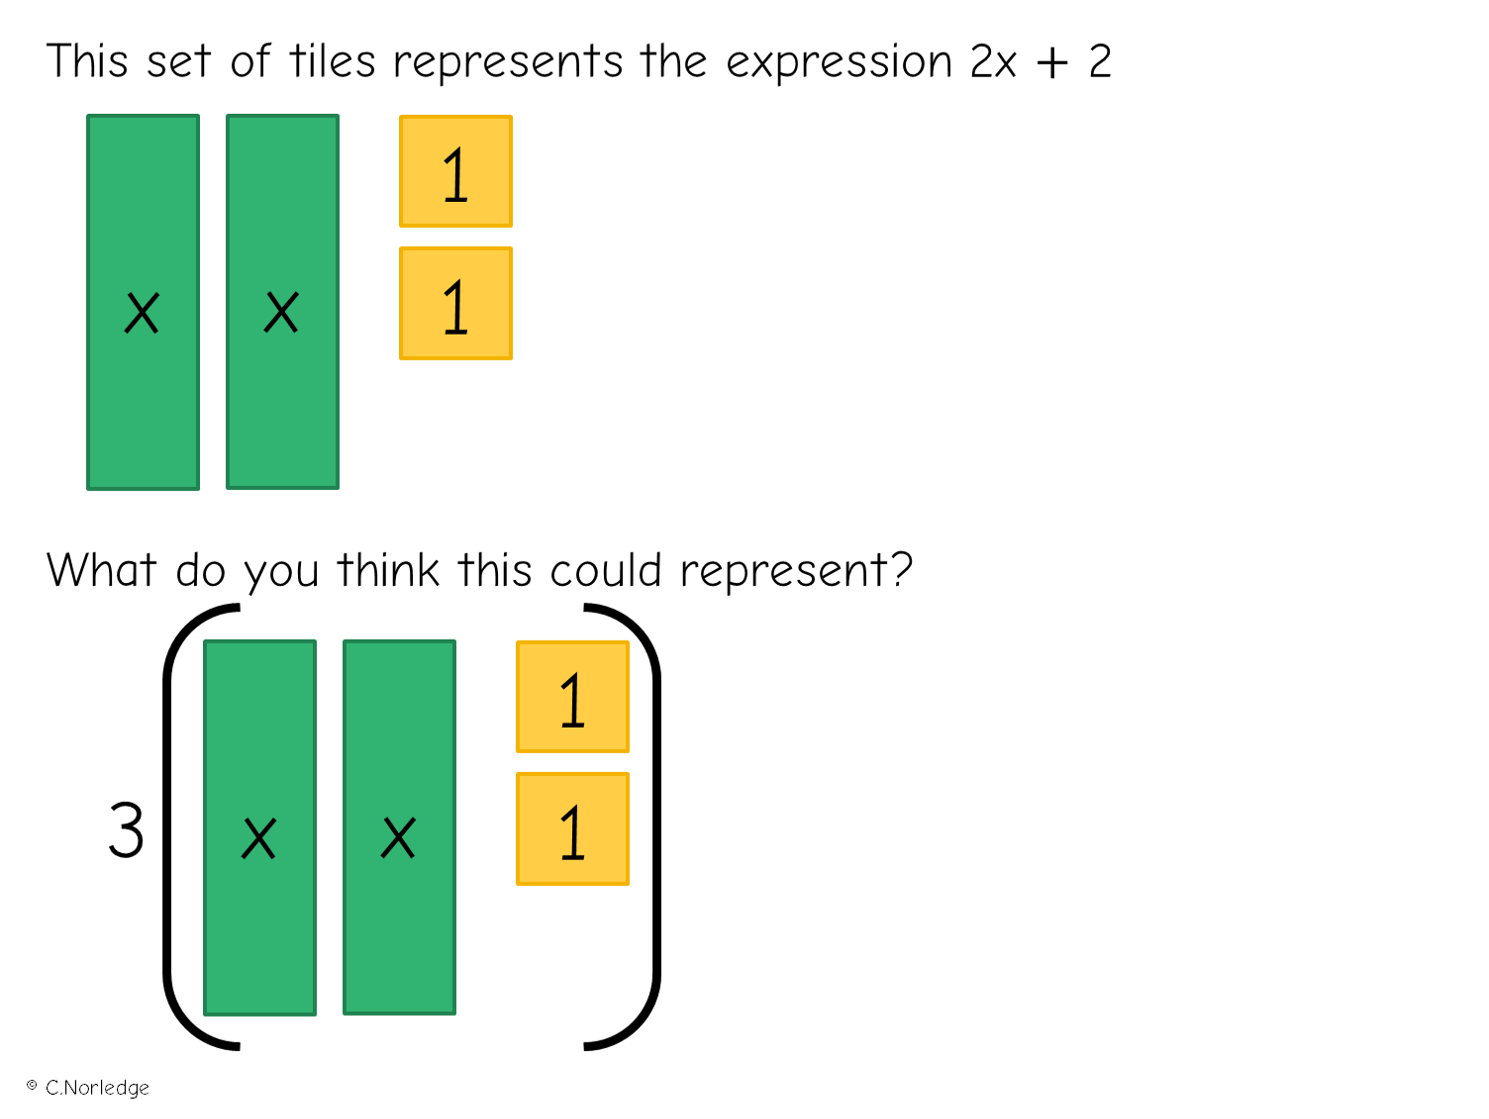
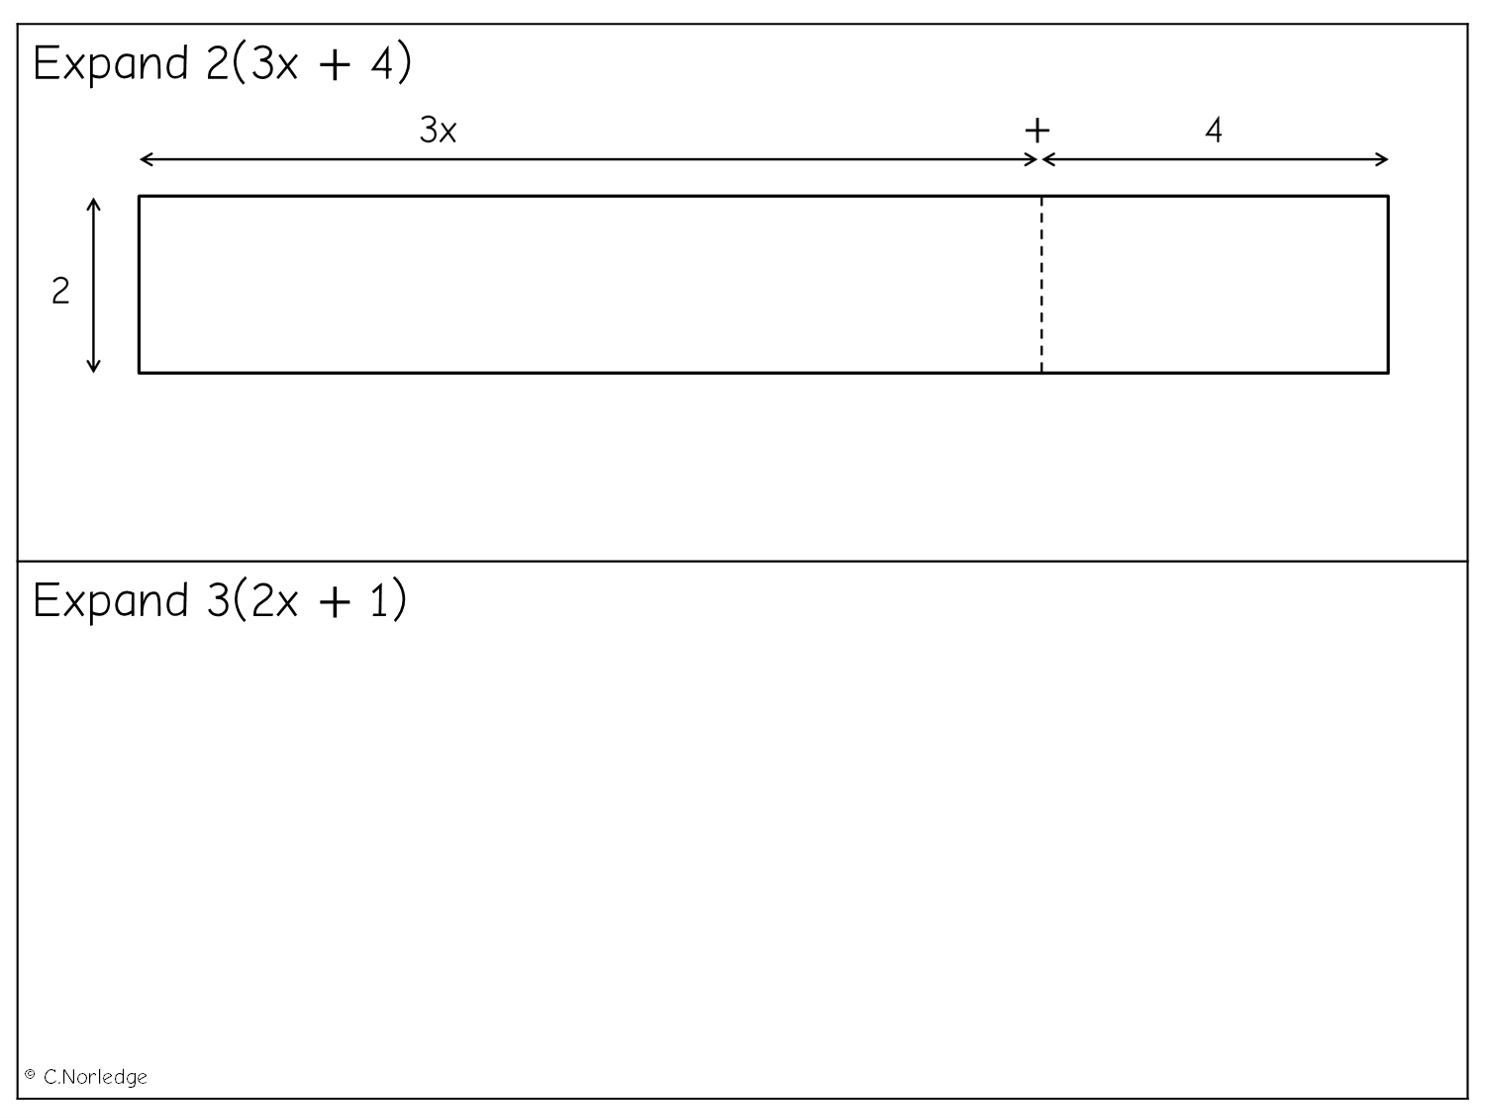
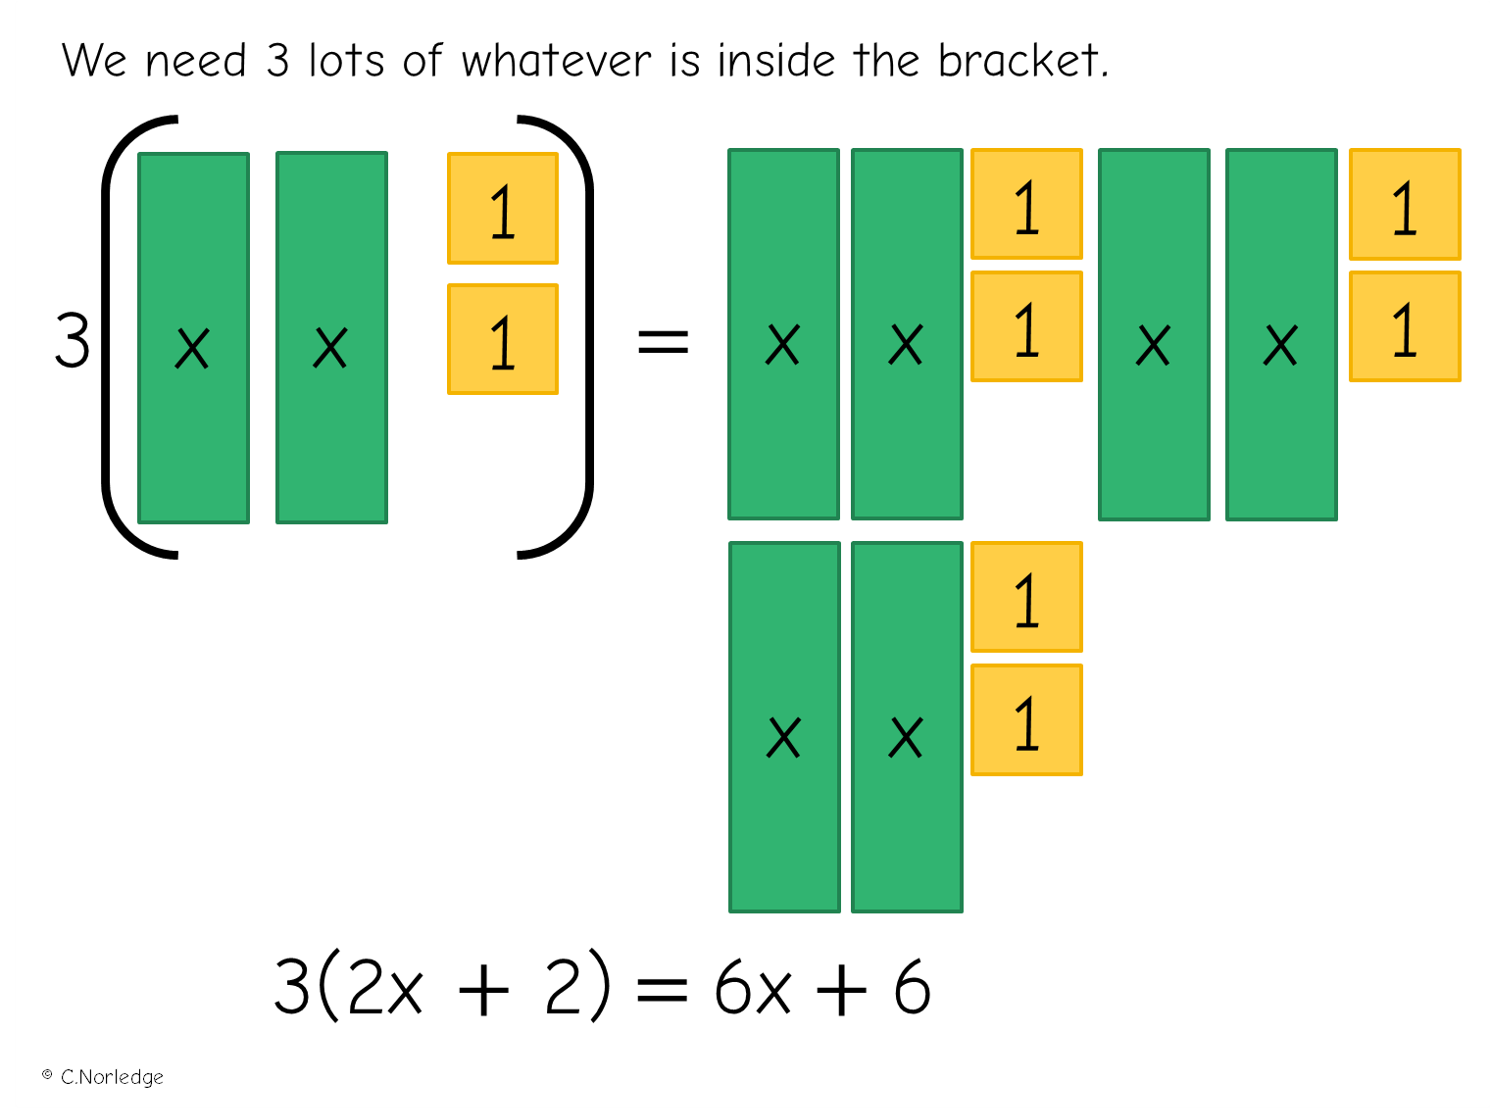
Using algebra tiles to model expanding single brackets is really useful because learners can physically count out the required number of groups. There’s something fairly intuitive about brackets representing multiplication when you see the contents of the bracket represented as tiles rather than just algebraic terms. 

Introducing expanding brackets using algebra tiles

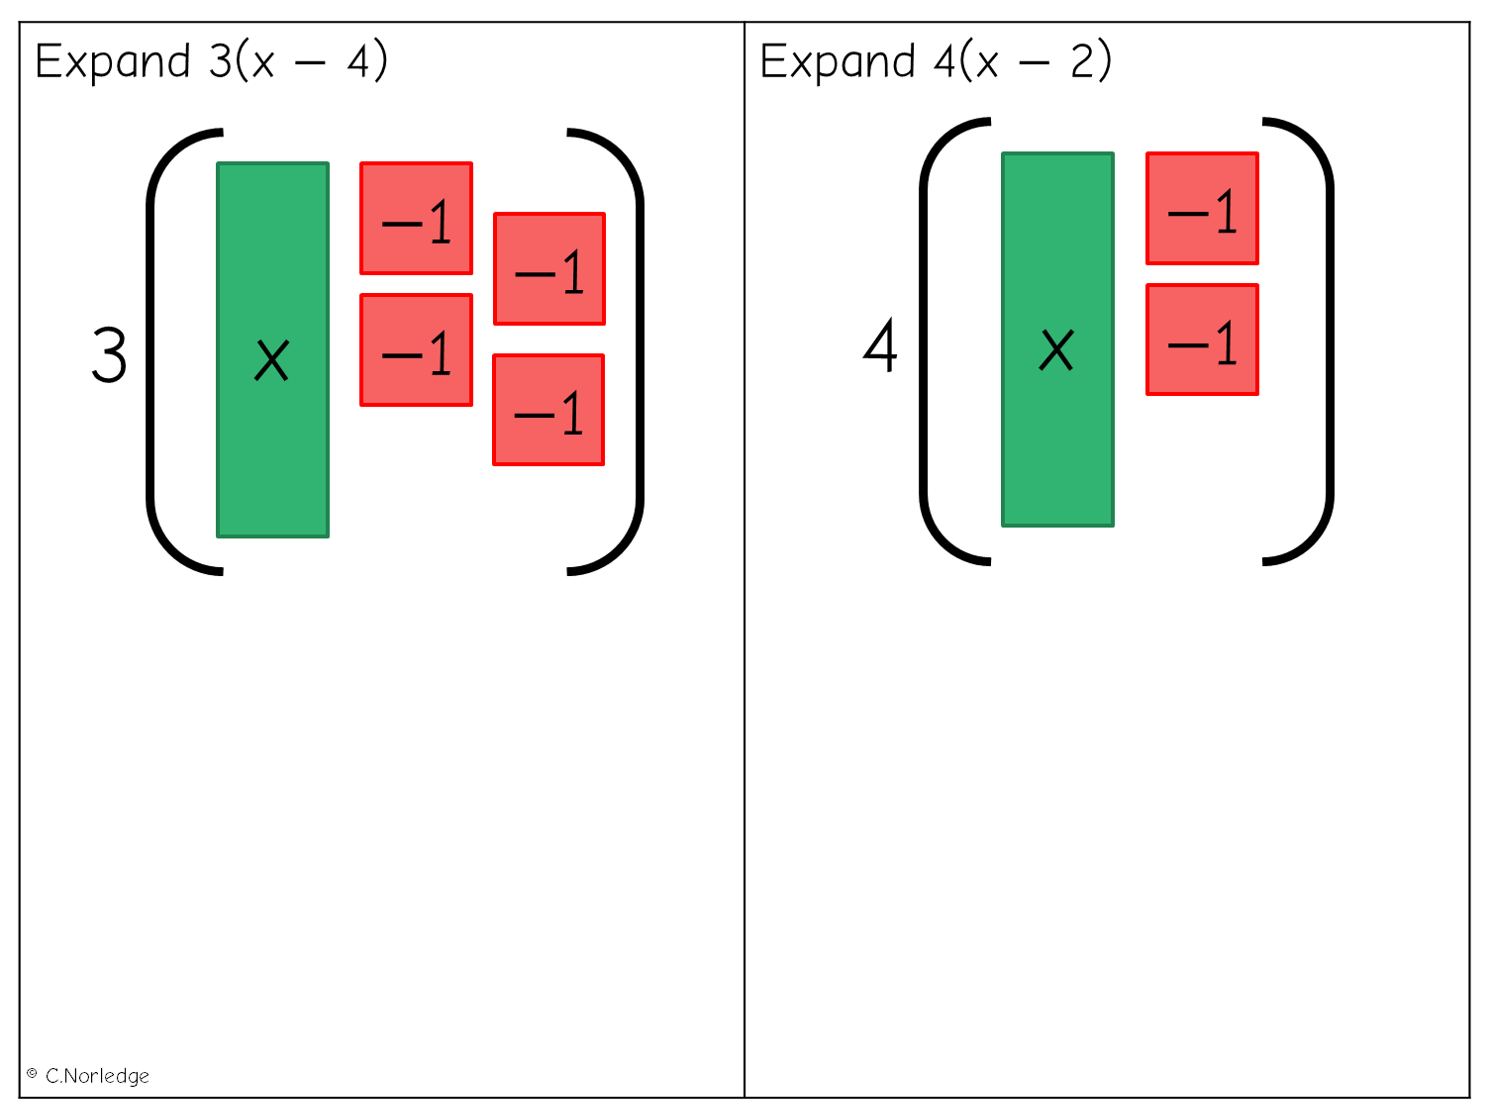
So to start with, we’re just getting used to the notation:

A nice thing about using algebra tiles for expanding single brackets is that learners are much less likely to forget to multiply the end term by the term outside the bracket!

This topic is an area where virtual manipulatives nearly trump the physical for me – so plenty more to look at on the MathsBot algebra tiles manipulative, which lets you create a group of tiles and then just duplicate that group as many times as you need.

Next, an example-problem pair:

A quick note on using negative tiles – I think they’re fantastic when solving equations for modelling creation of zero pairs, but I tend to avoid them in most cases when working with area models with algebra tiles. But then the examples above ‘feel’ OK to me, because we’re not yet placing these tiles into a rectangle and representing an area.

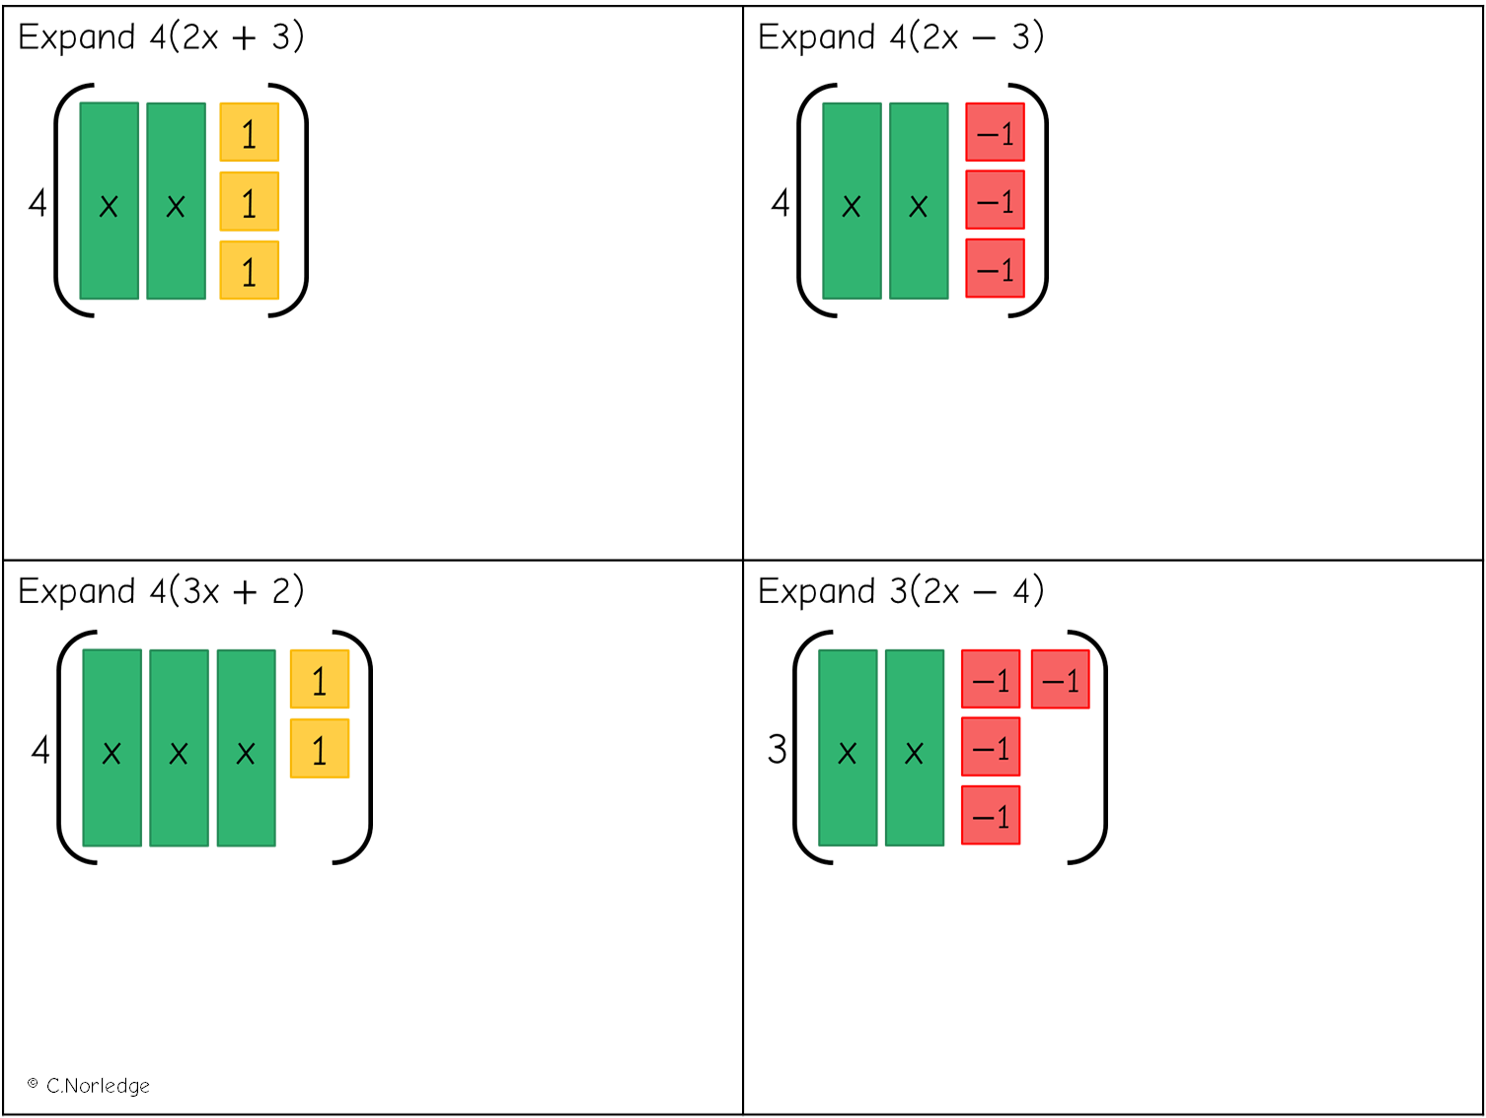
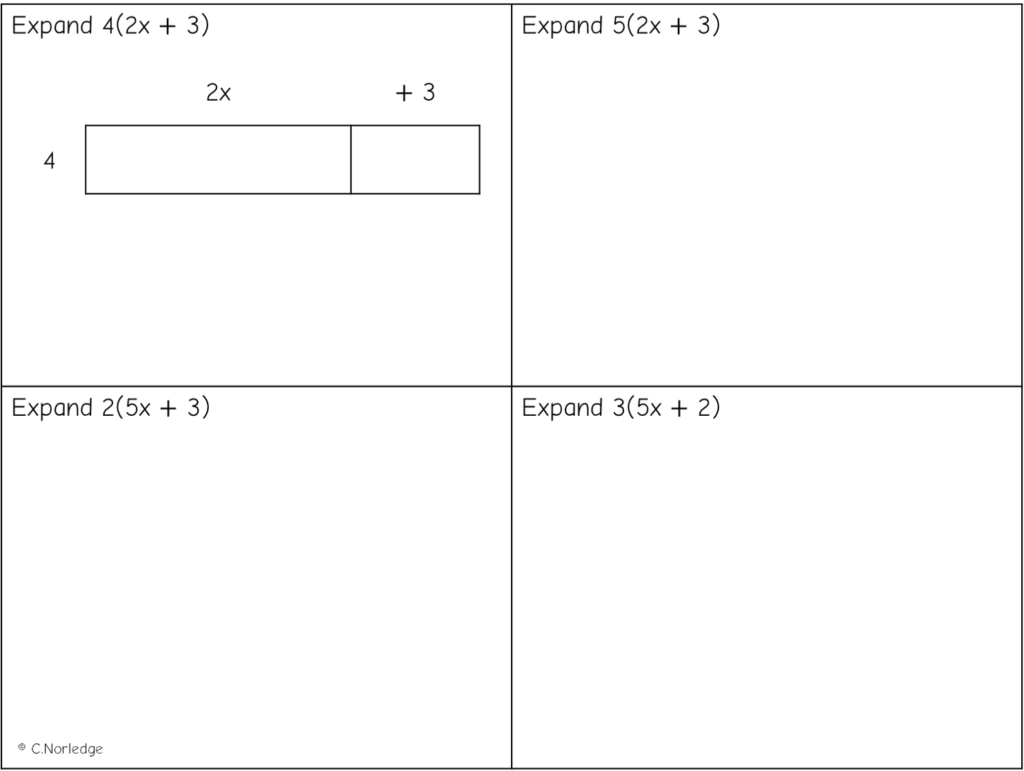
And then a few more to try…

Depending on the group and how we’d got on so far, I might give them a version of the above without the tiles pre-drawn, or with only some examples pre-drawn – and again, MathsBot all the way for modelling.

Moving towards an area model

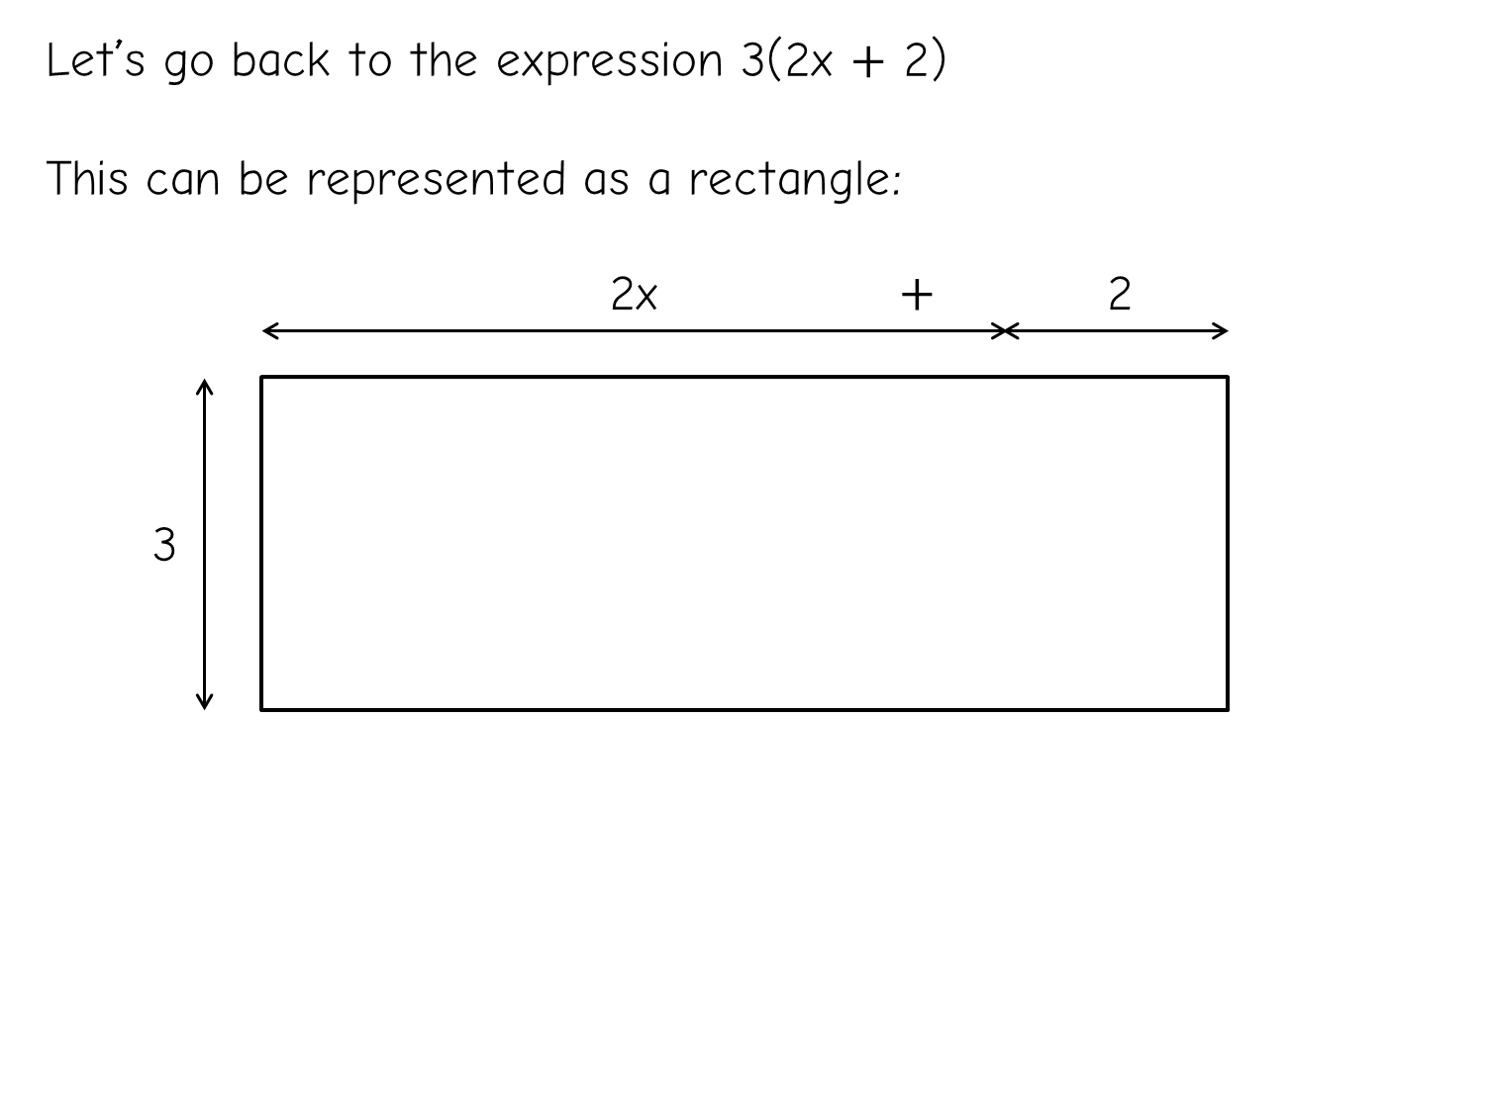
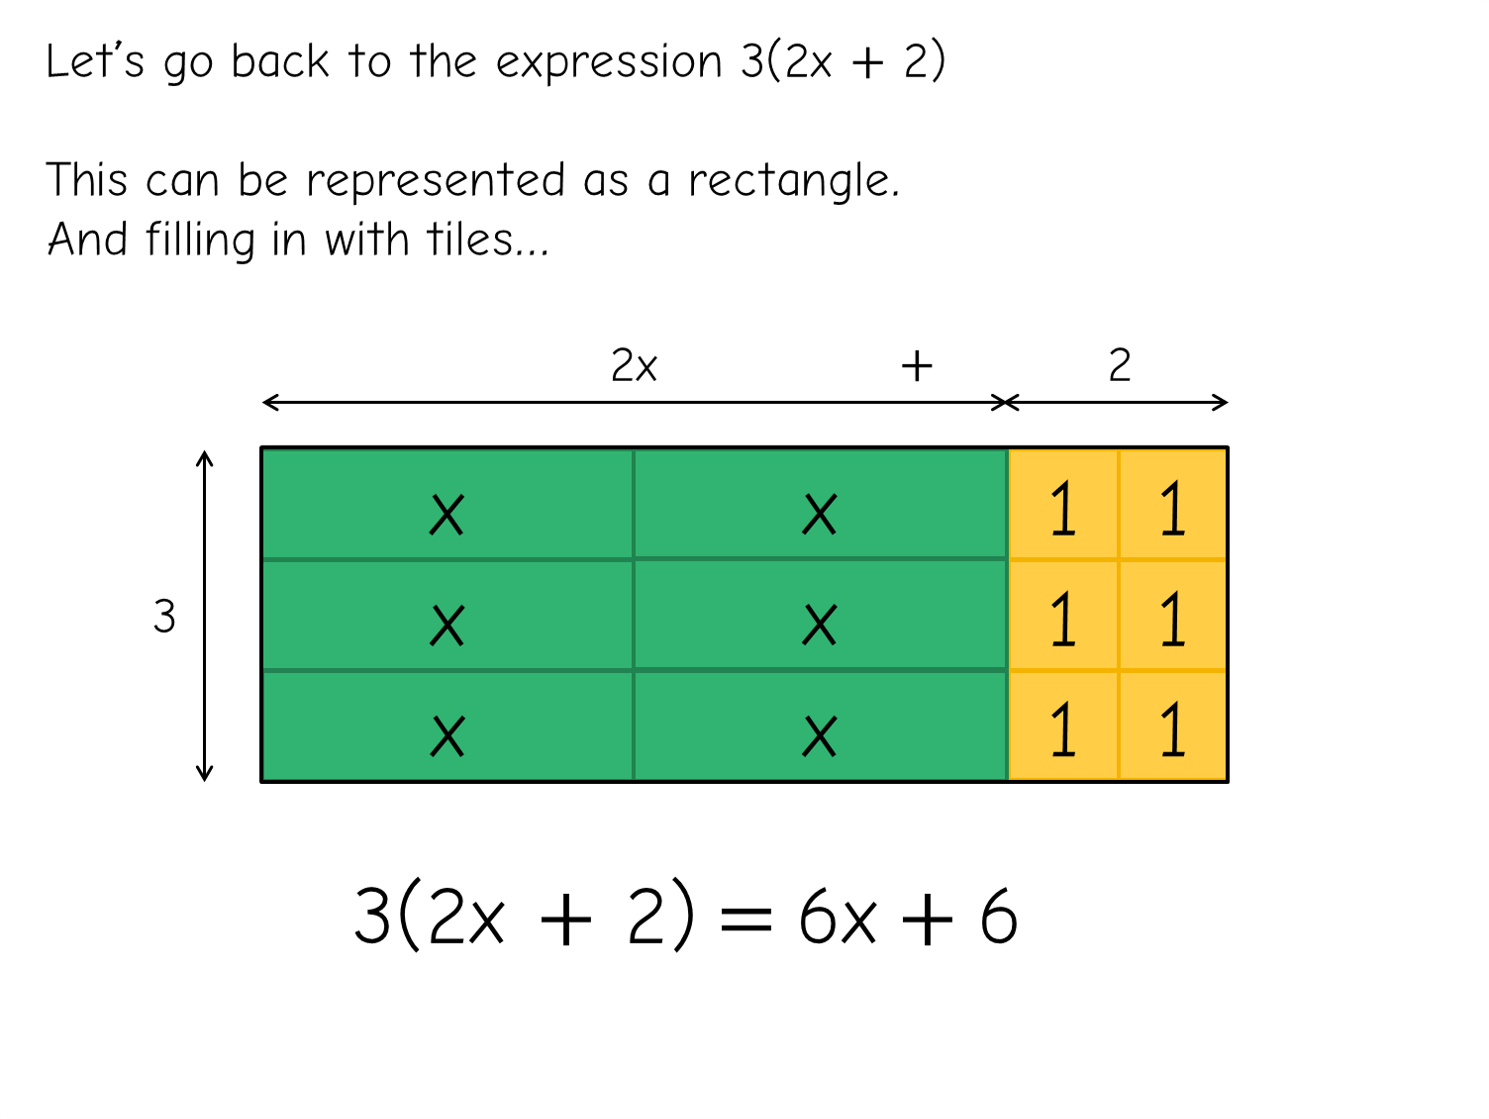
The next conceptual leap forward is moving away from algebra tiles and towards an area/grid multiplication model (before ditching the structures altogether for most learners). This is where I find negative tiles a bit conceptually problematic, so I tend to stick to positive terms for concept development:

And another example-problem pair:

From area to grid...

And then we gradually begin to reduce the reliance on the model:

As learners work through more of these, they realise that they don’t need to worry about scaling their diagrams to make sure that the 2x bit is exactly the length of 2 x tiles. Then it becomes “do I have to fill in all the tiles, I know there are going to be 8 x tiles in the first box, can I just write 8x?”

Gradually learners move themselves towards a grid-type method – they might need pushing a bit, but generally anything that’s a shortcut or doesn’t involve drawing piles of tiles out is well received!

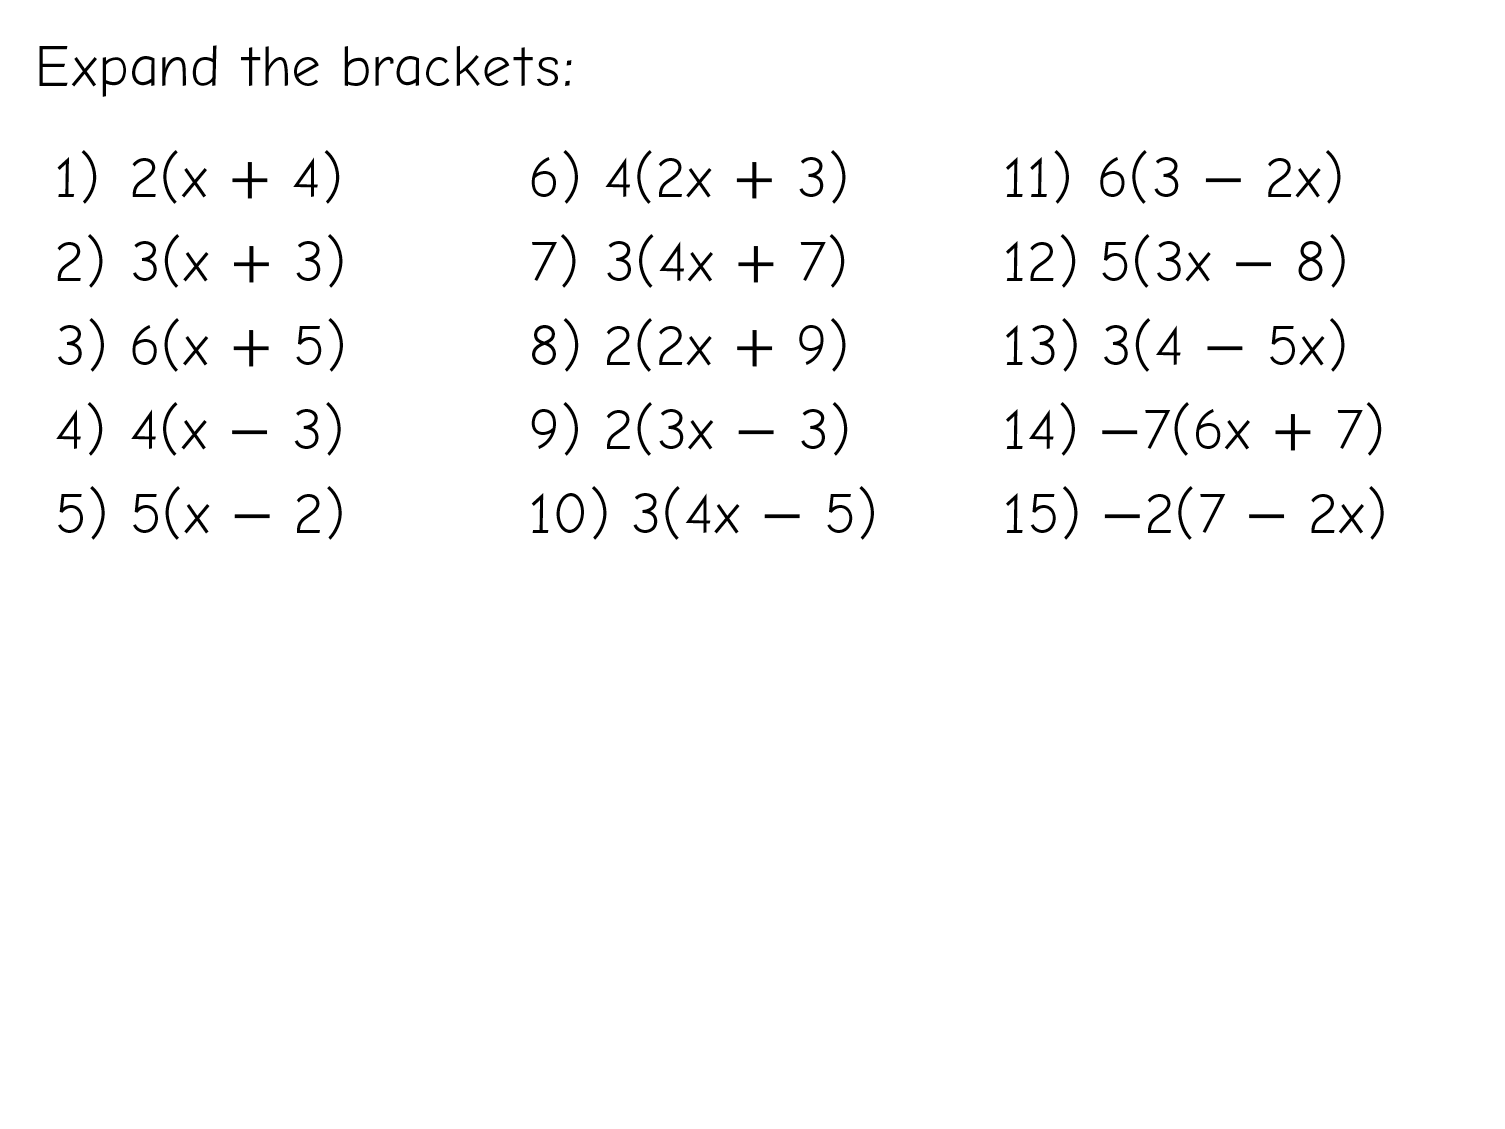
Practice exercise

Finally, a quick exercise to tackle any way desired – the numbers are small enough to work with algebra tiles if necessary.

Expanding single brackets using algebra tiles Read More »
Solving linear equations using algebra tiles

By the time I teach linear equations, I’ve already used algebra tiles quite a lot with learners to create algebraic expressions.

After working through one-step equations and ensuring learners understand the processes involved (rather than just solving “by eye”), I move on to simple two-step linear equations. 

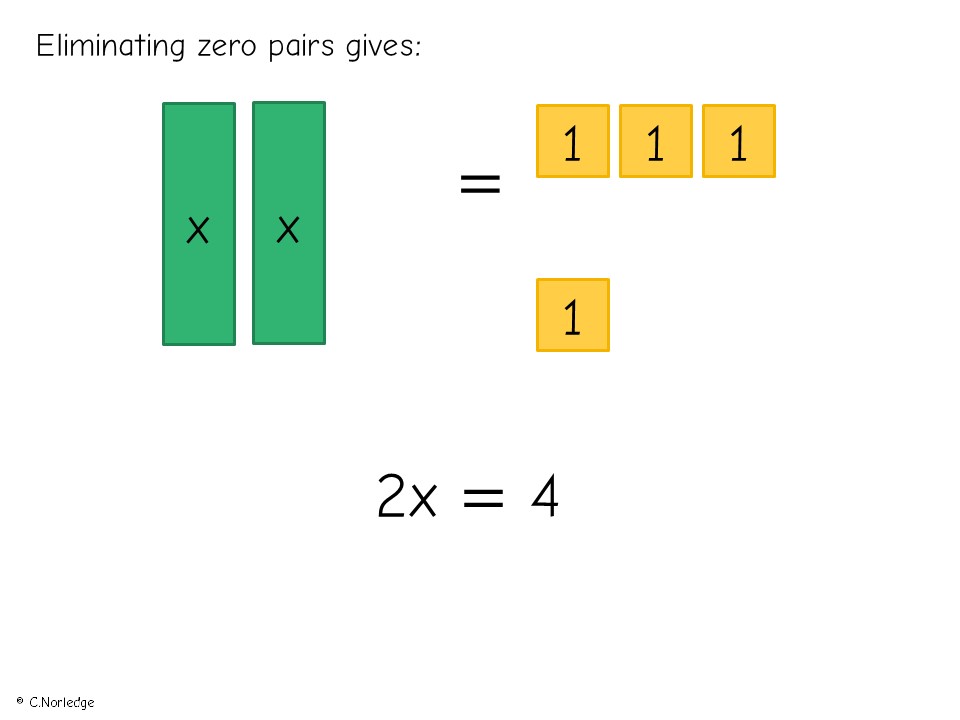
If learners aren’t familiar with the concept of zero pairs from earlier work on equations, or from work with negative numbers, it’s important they understand these concepts before going further.

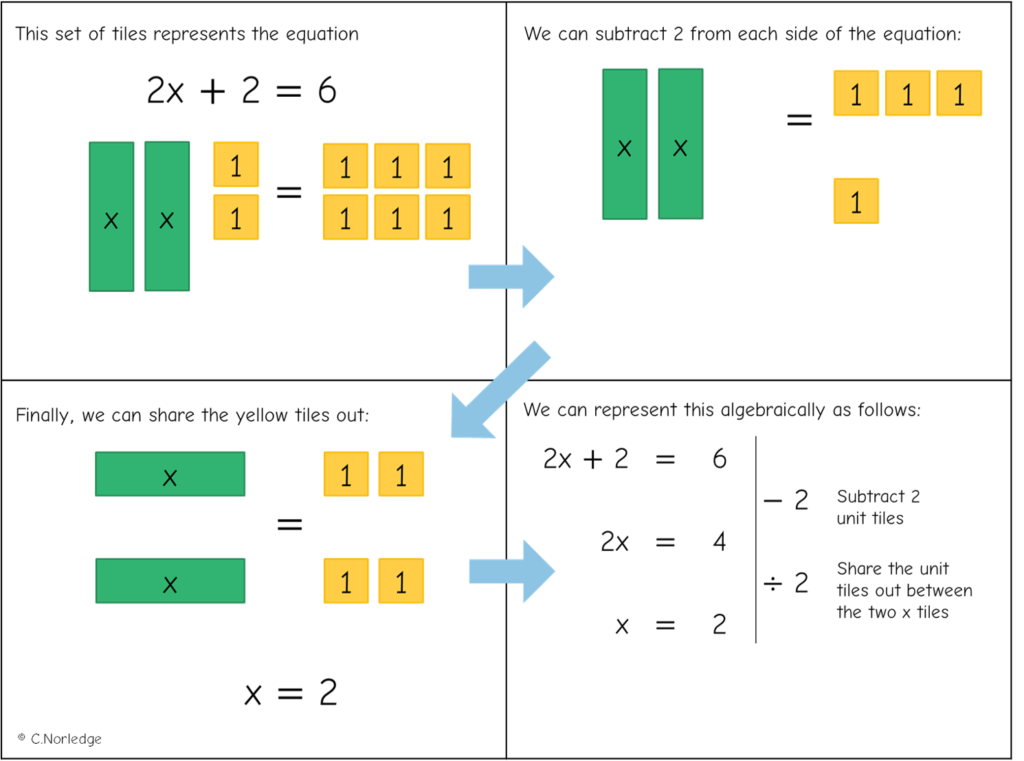
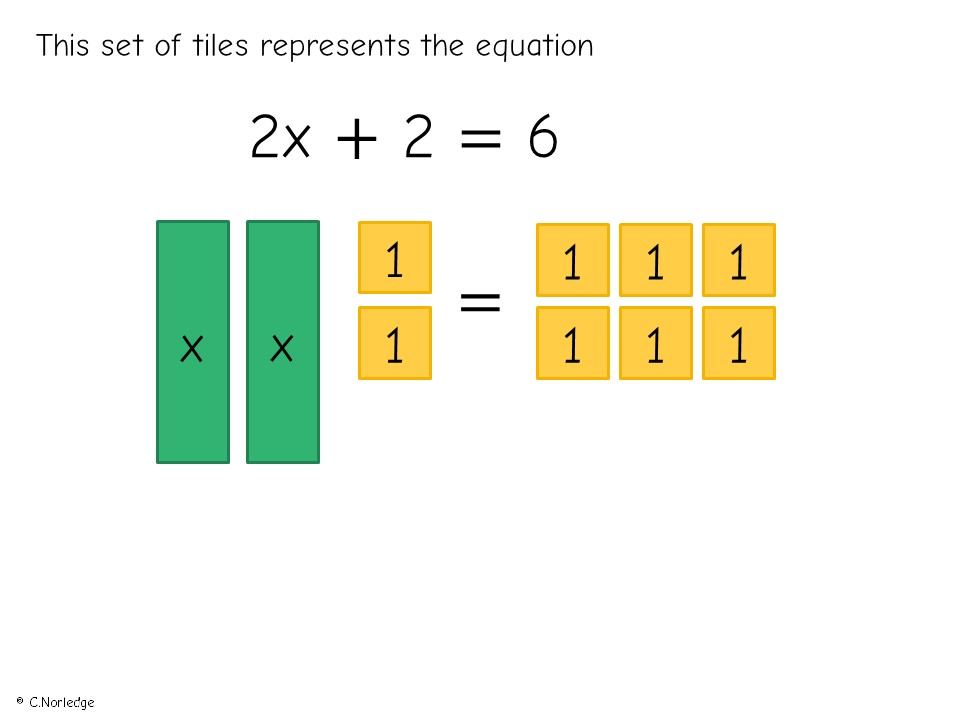
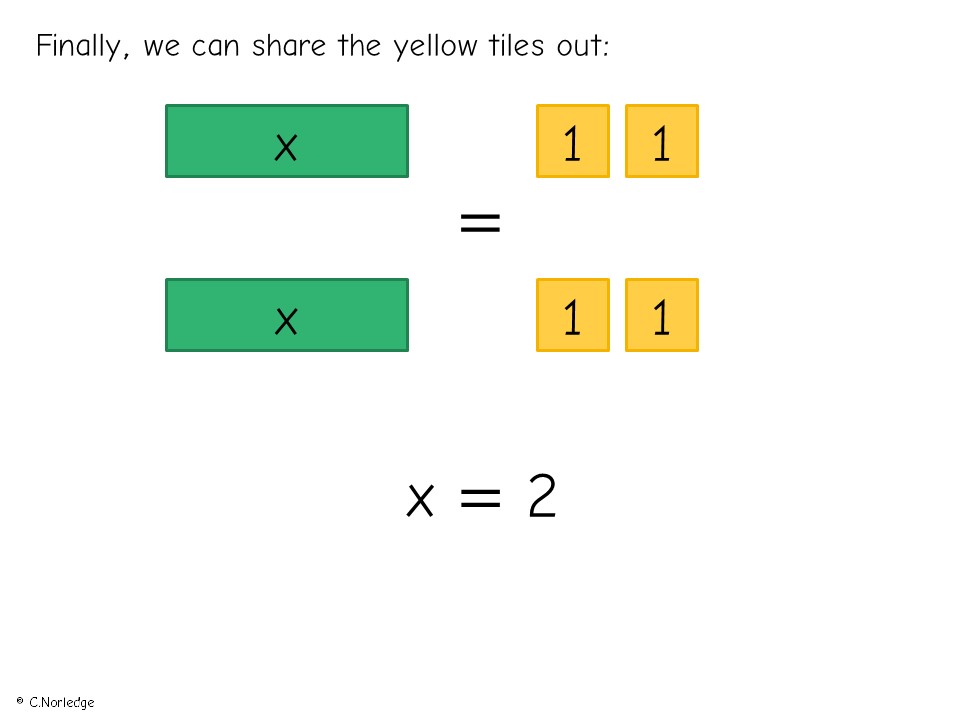
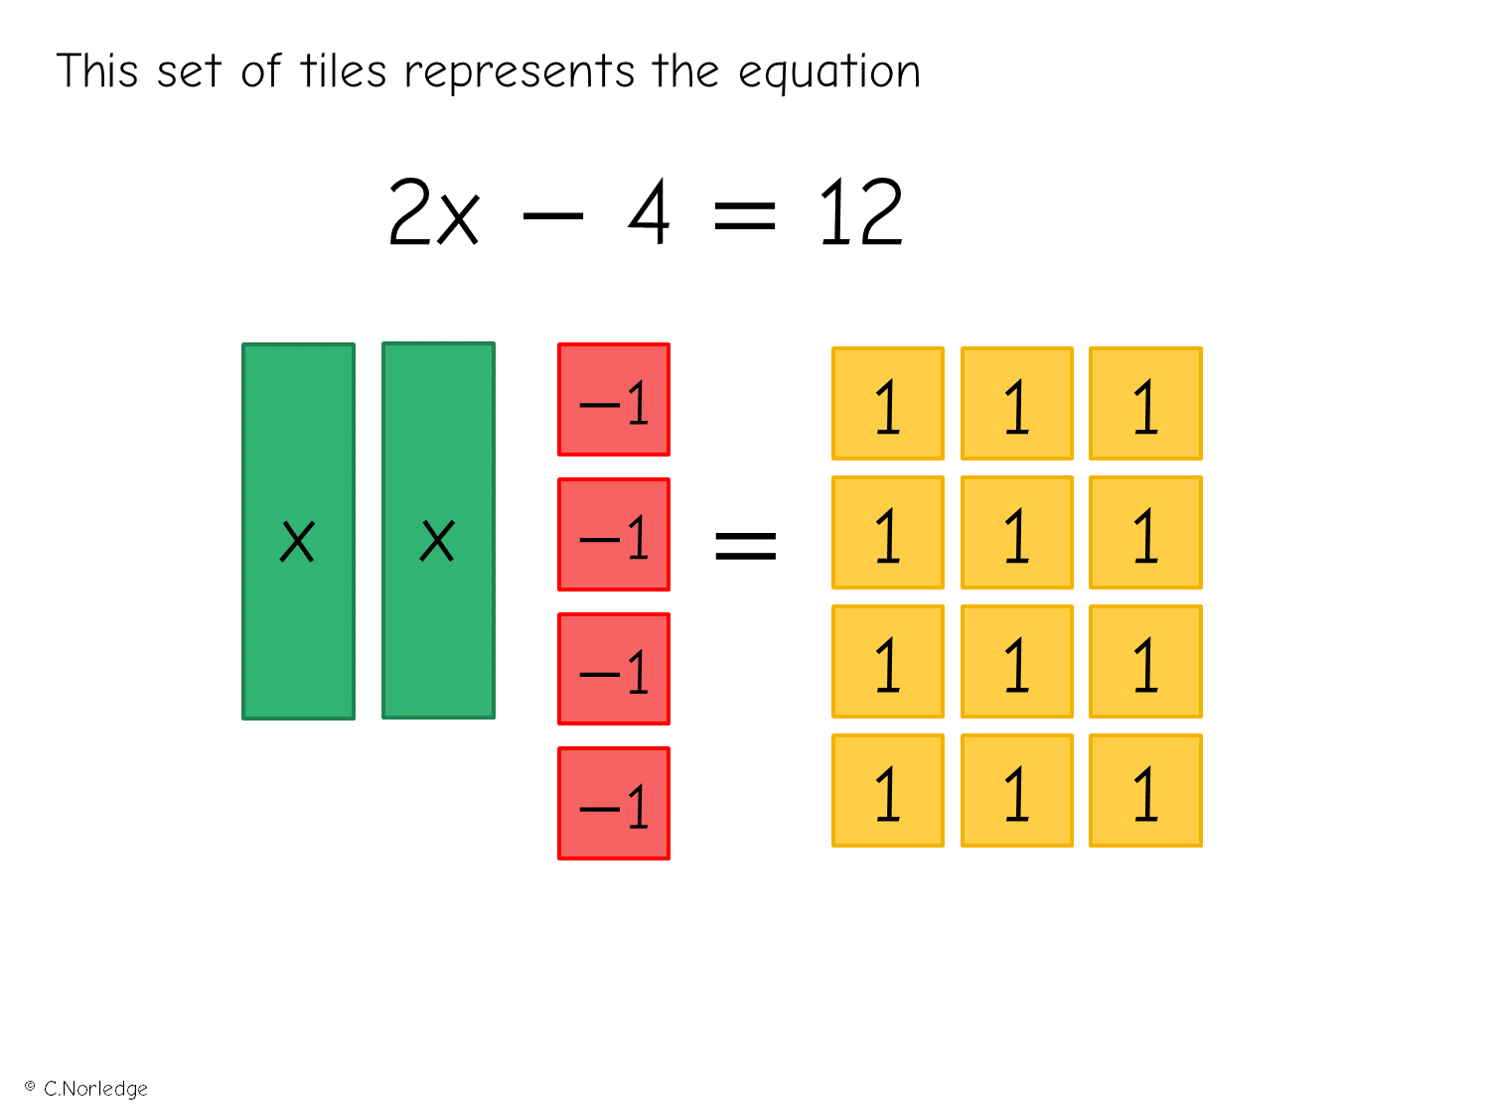
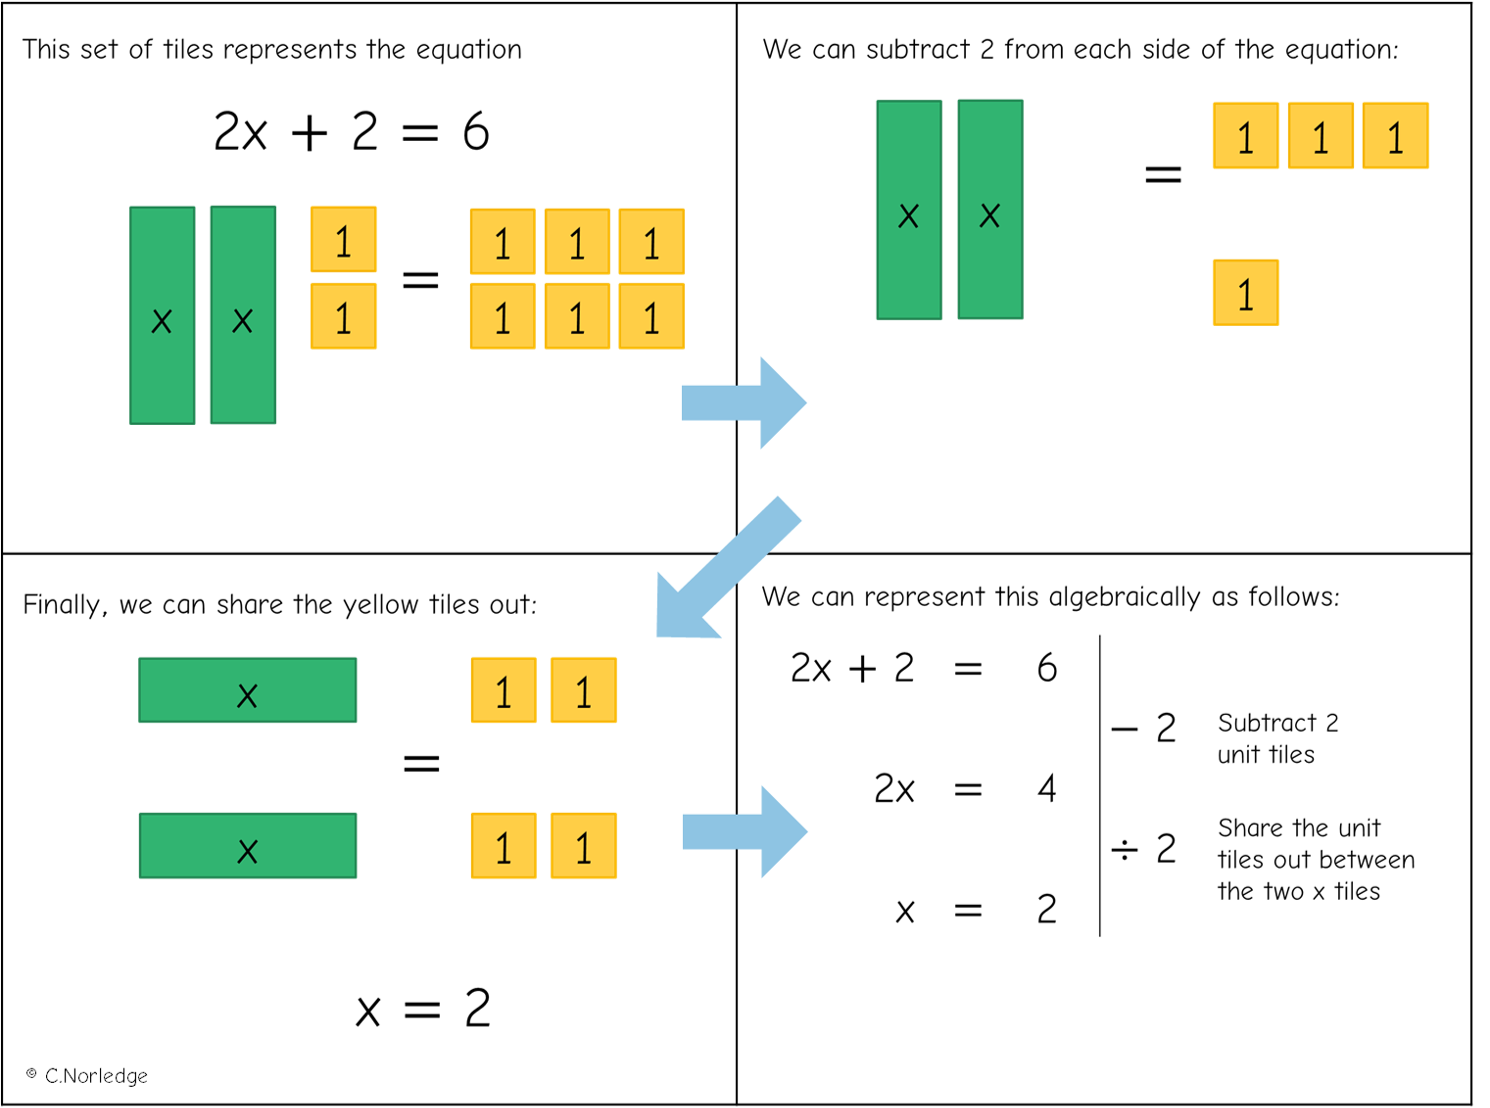
Here’s a straightforward introductory example:

And an example-problem pair (I’d use the MathsBot algebra tiles manipulative to model this).

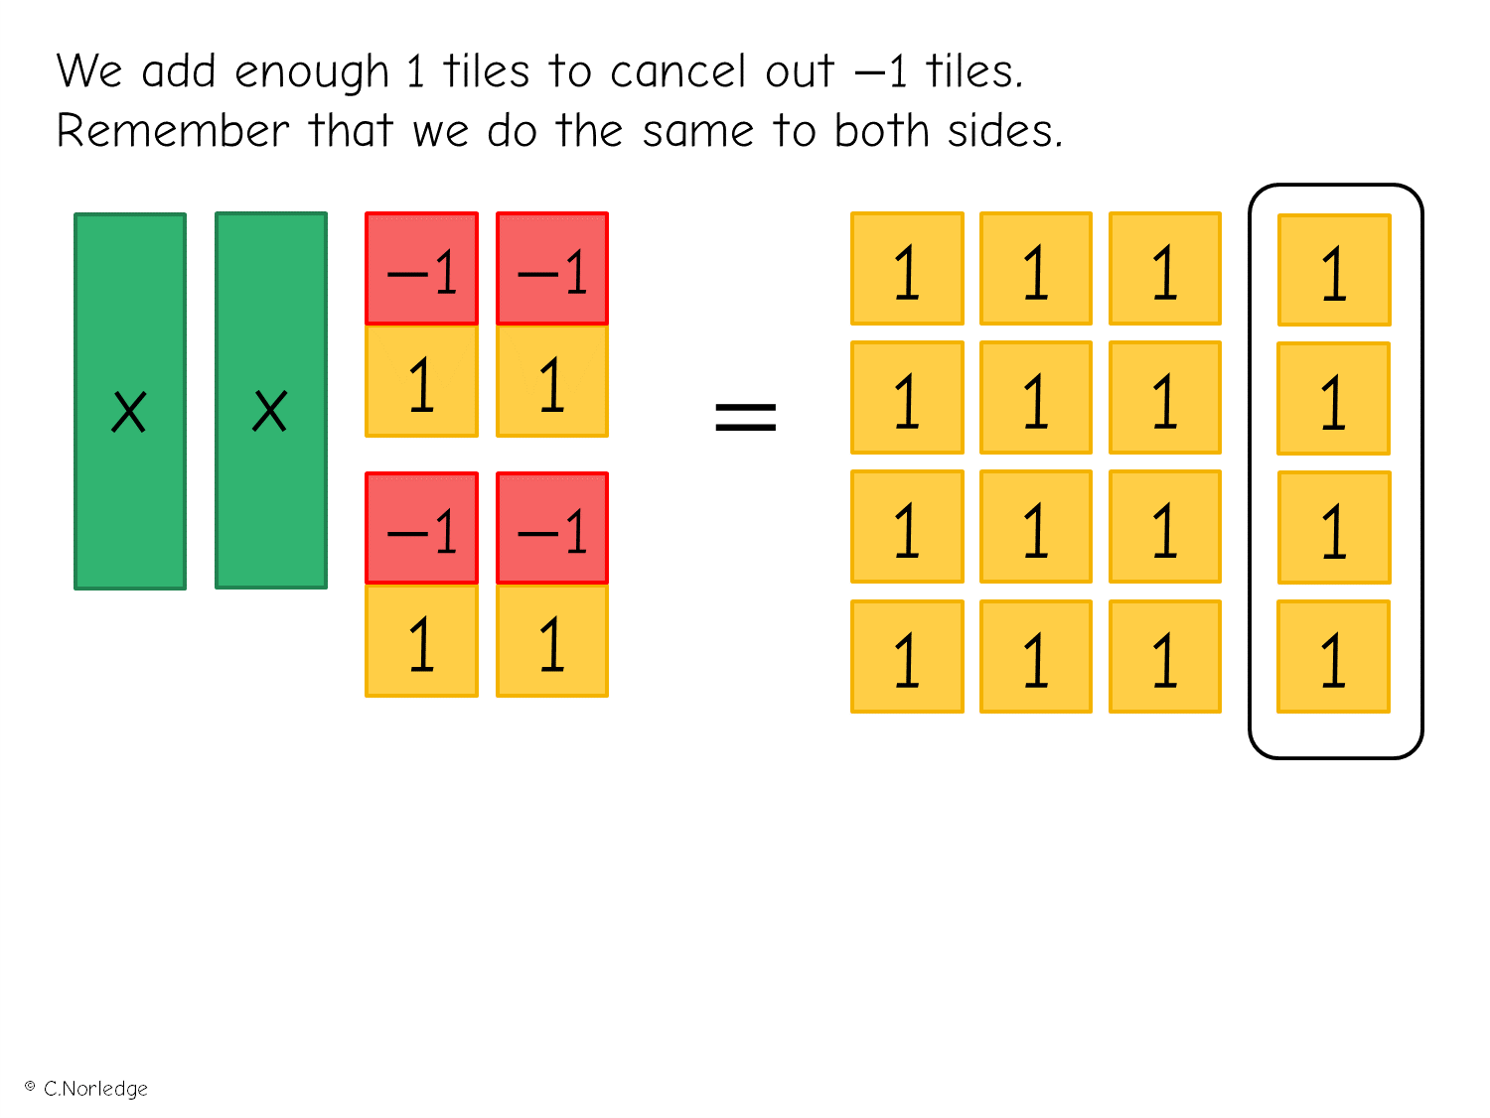
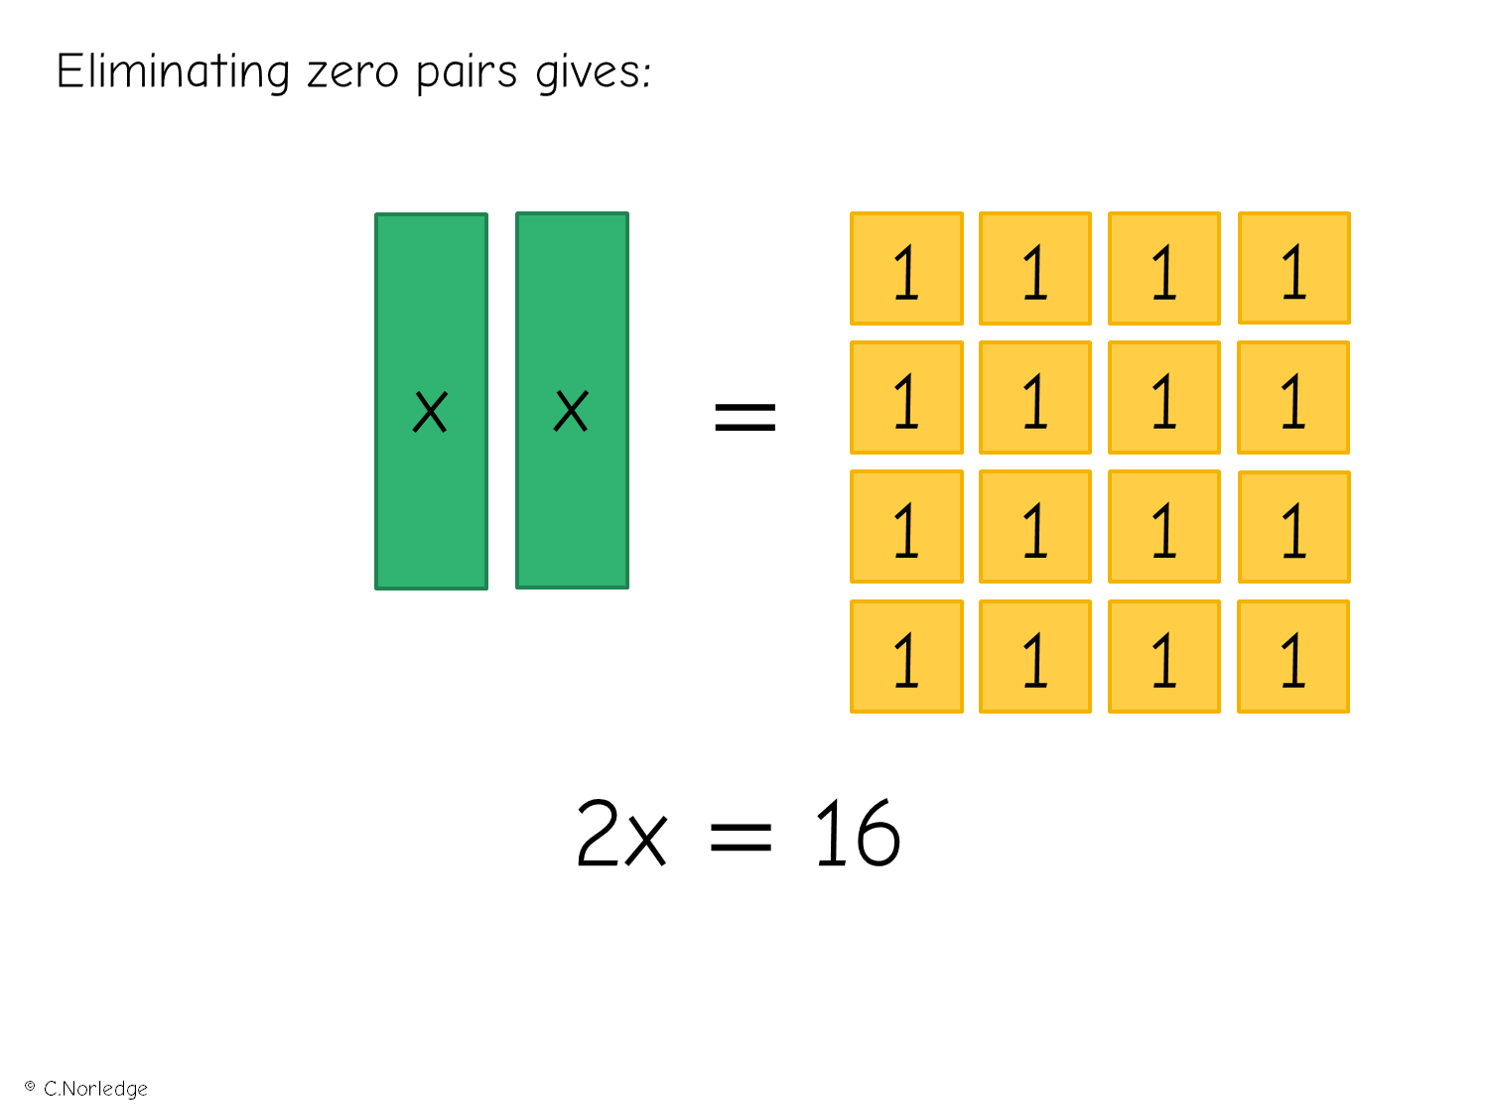
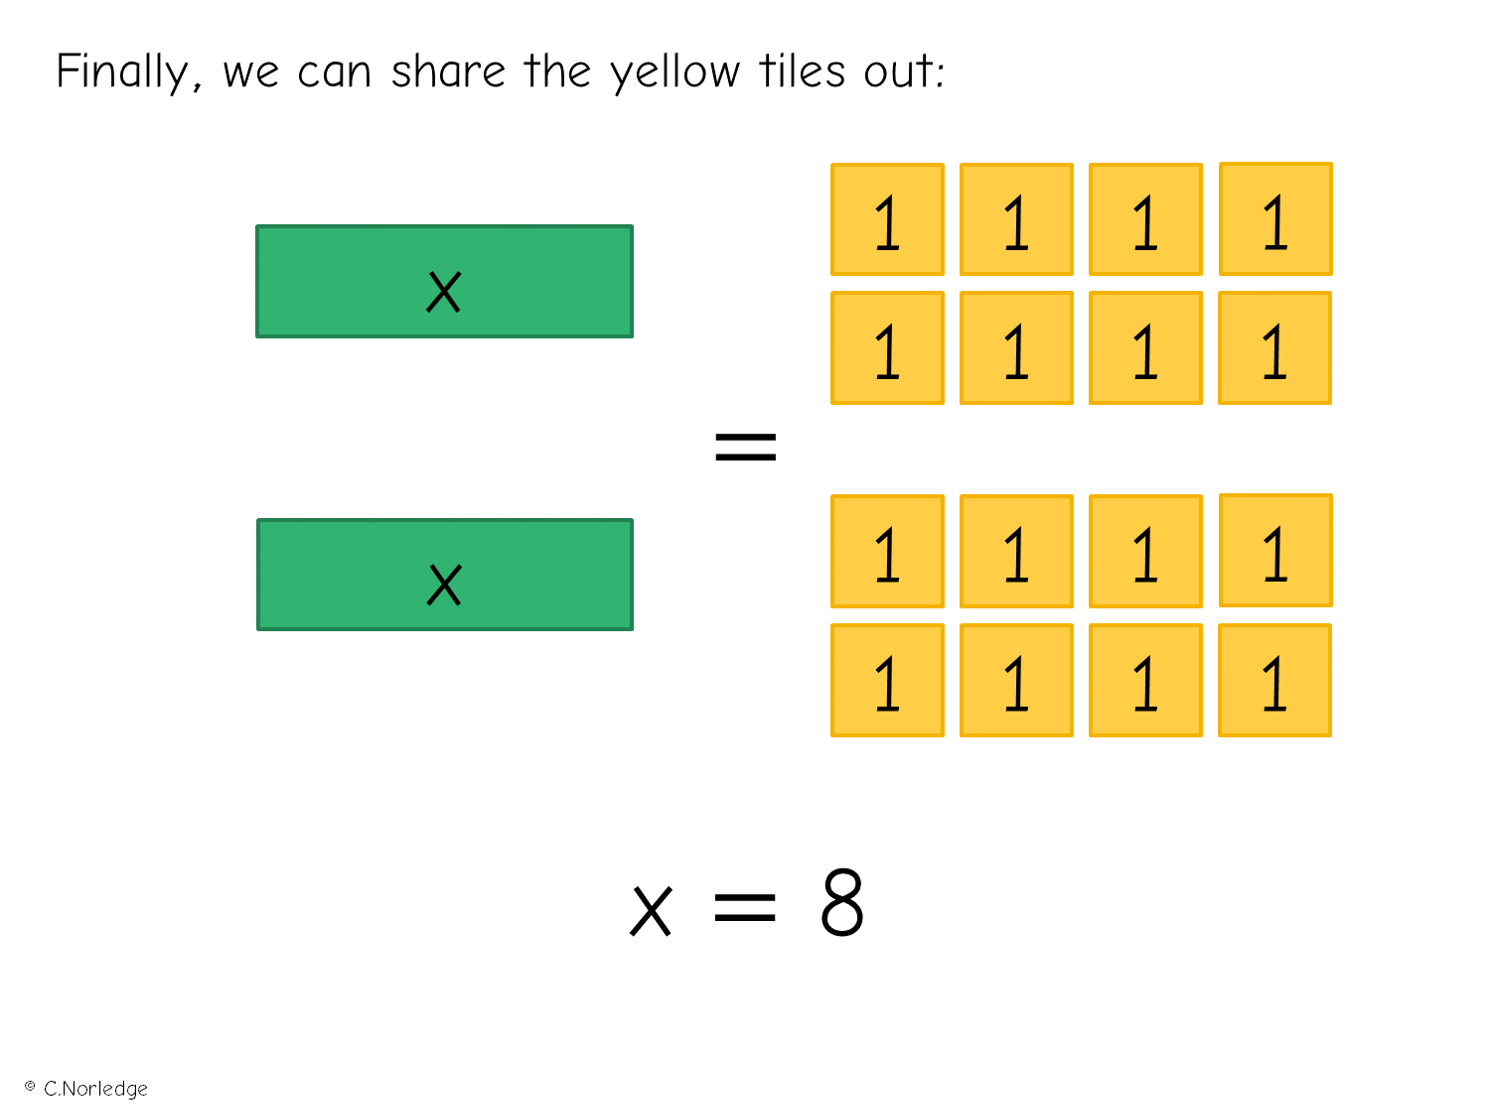
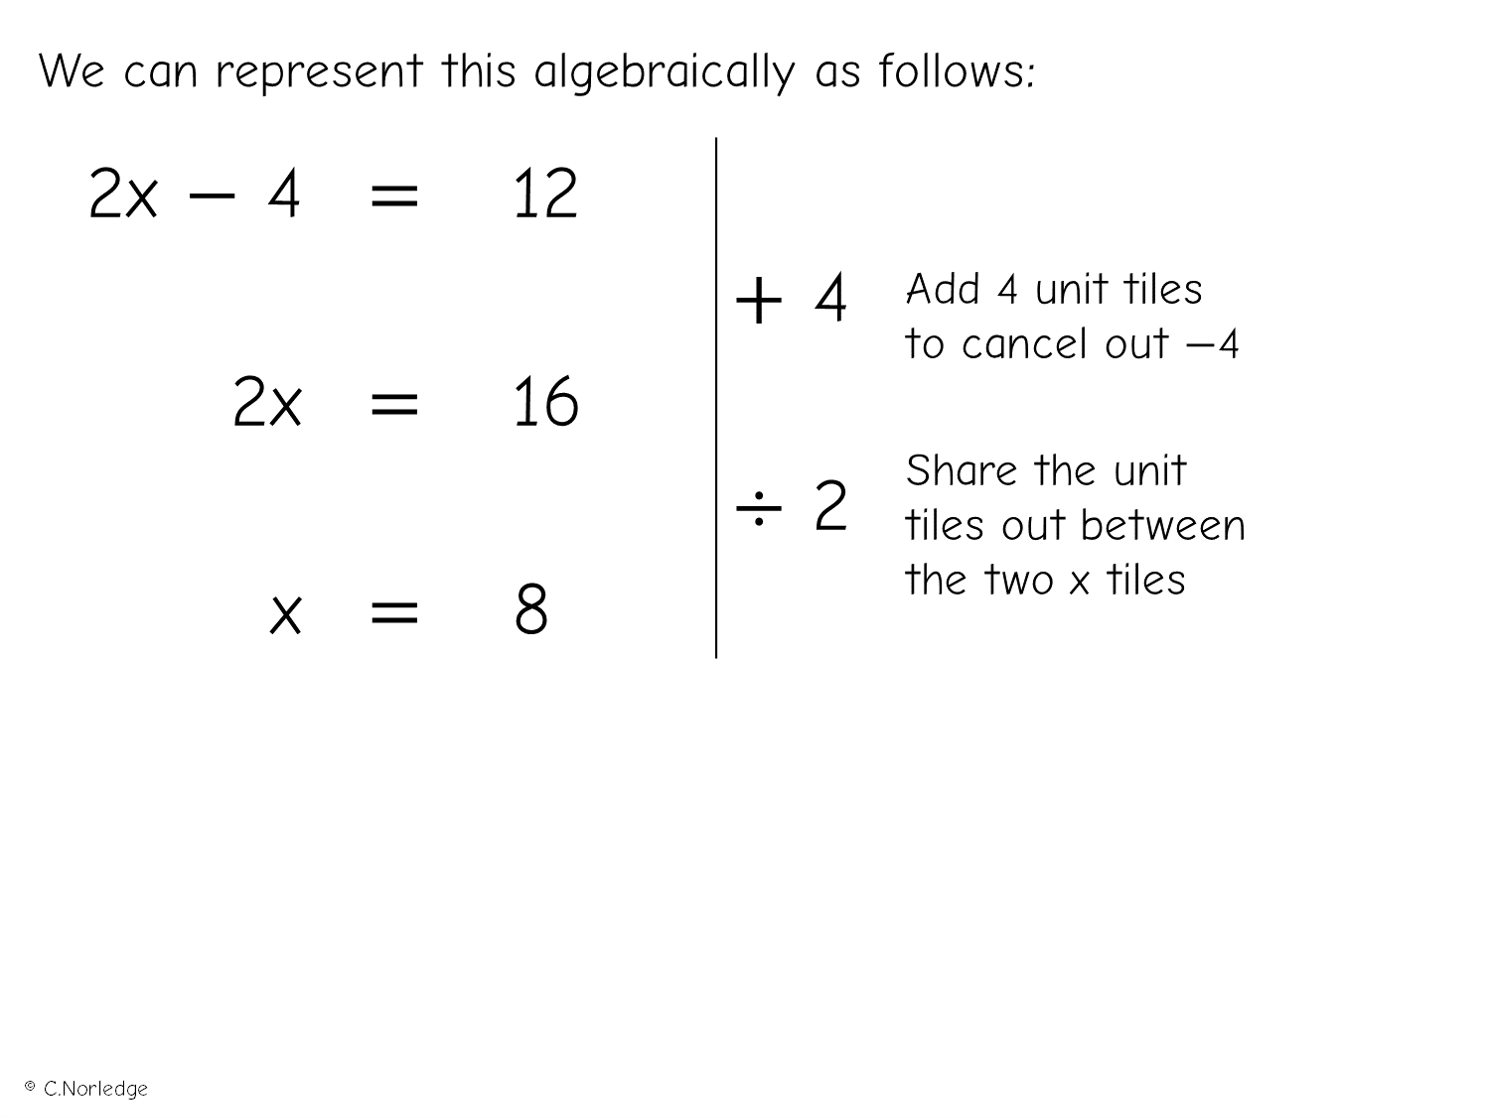
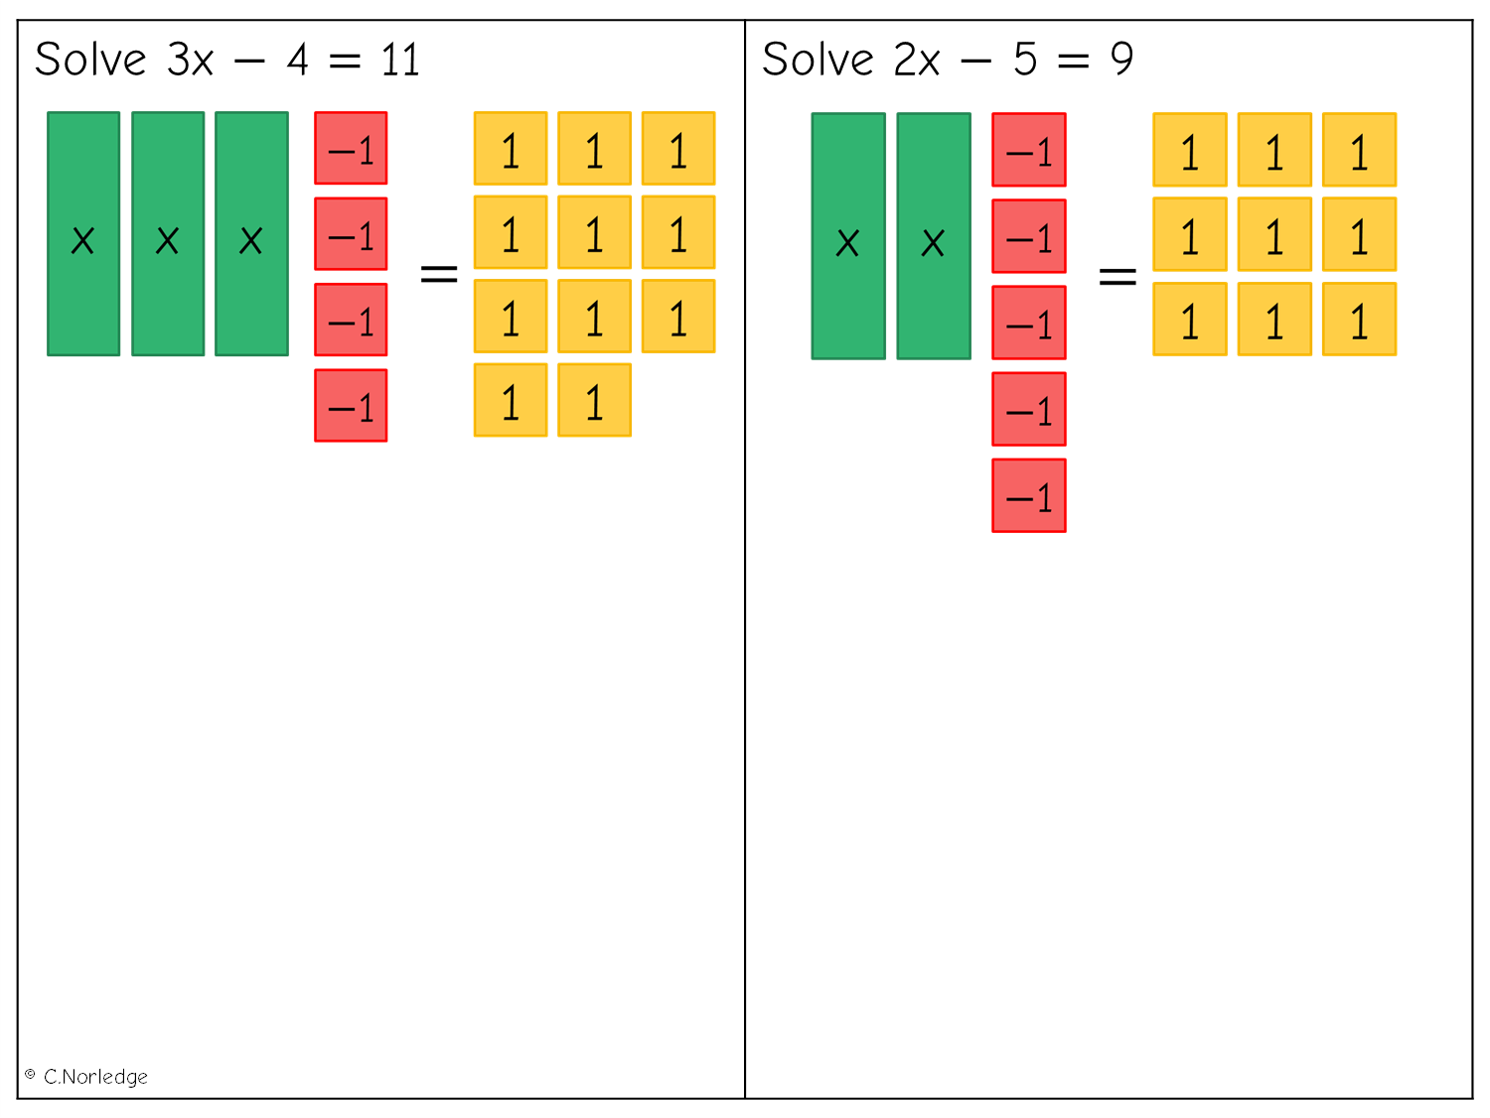
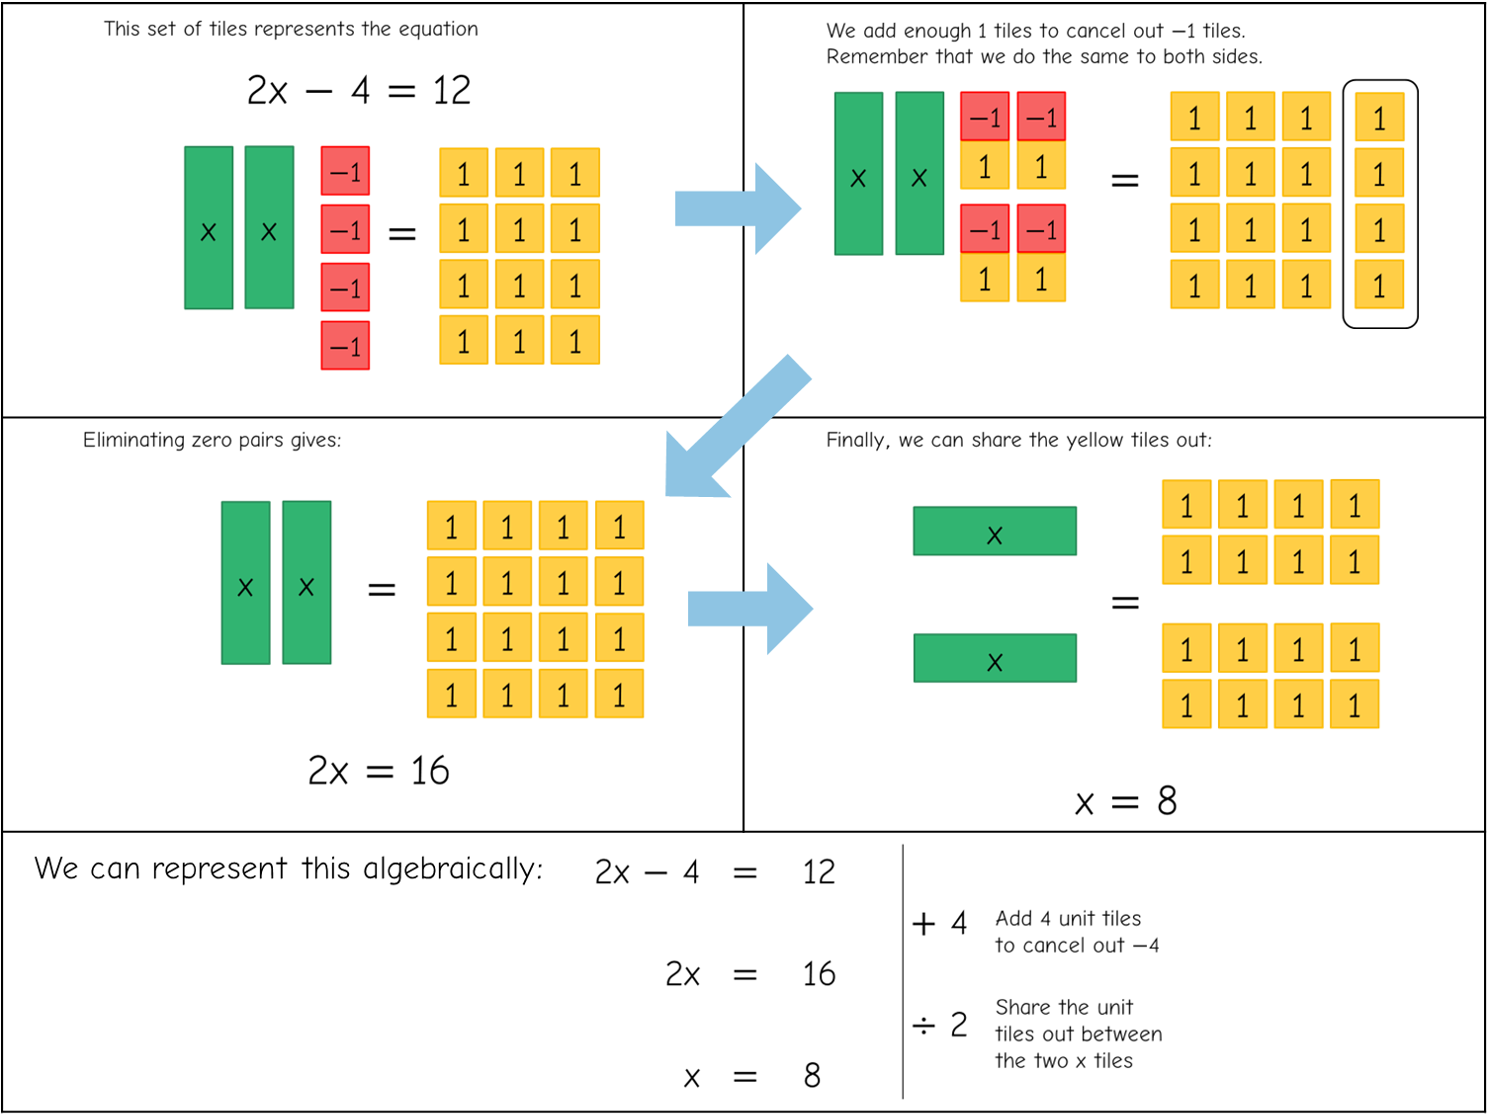
Next, an example involving subtraction of a constant term:

And another example-problem pair:

It’s important to choose an independent practice exercise with sensible numbers when working with algebra tiles – if you’re going to set some problems for learners to practise using the models, smaller numbers are better, particularly if learners are working with physical tiles (virtual manipulatives are better at quickly duplicating large numbers of tiles!).

I also tend to teach solving linear inequalities at the same time, as it helps pupils see the connection between the two topics. For some reason, pupils panic at inequalities in exam situations, even though the solving process is identical, and teaching both equations and inequalities at the same time goes some way to avoid this.

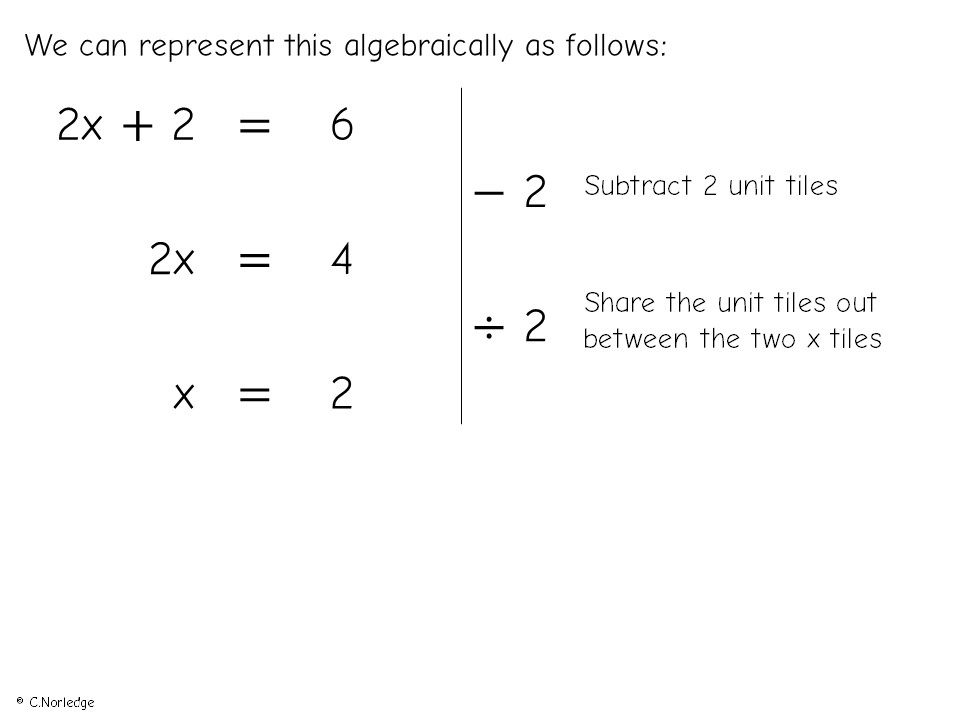
One thing that’s crucial when working with manipulatives such as algebra tiles is that pupils also develop ways of working with correct algebraic notation. When I teach this lesson, while I get pupils to use the tiles to model and demonstrate their calculations, I also ask them to record their working “traditionally” in their exercise books, reinforcing the move away from the tiles to a pure algebraic solution.

Finally, here are a couple of summary sheets with the examples above: 

Solving linear equations using algebra tiles Read More »

Cuisenaire rods for algebraic expressions

I’ve spent quite a bit of time so far over half term working on the resource areas of my site – one topic I was keen to get a few more resources for was writing algebraic expressions and using correct algebraic notation, as I’m teaching this to Year 7 after half term and my collection was looking a little sparse. 

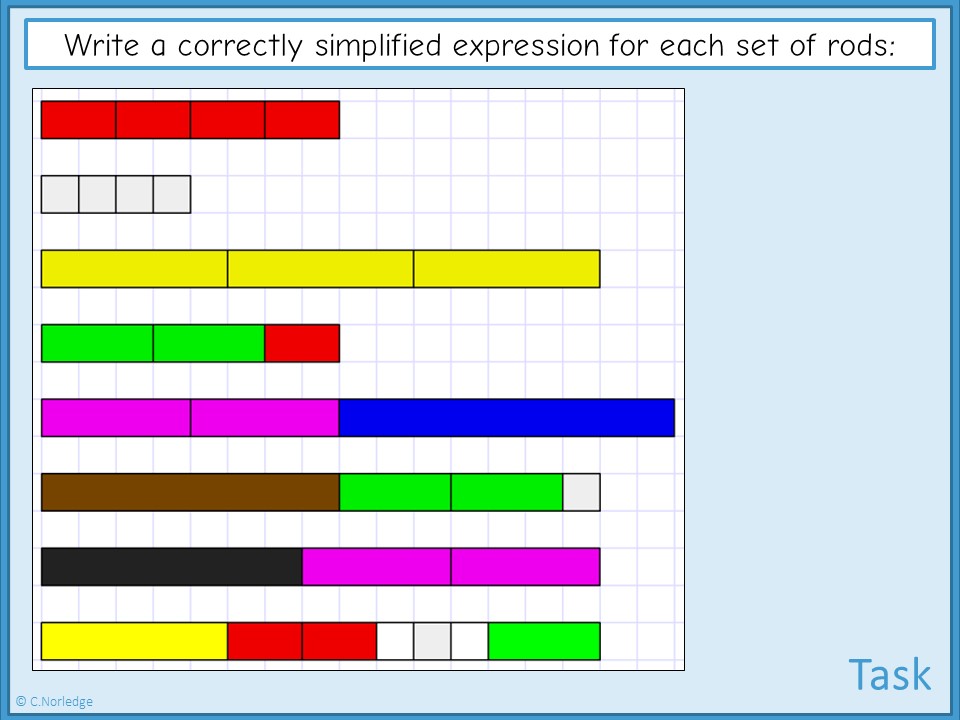
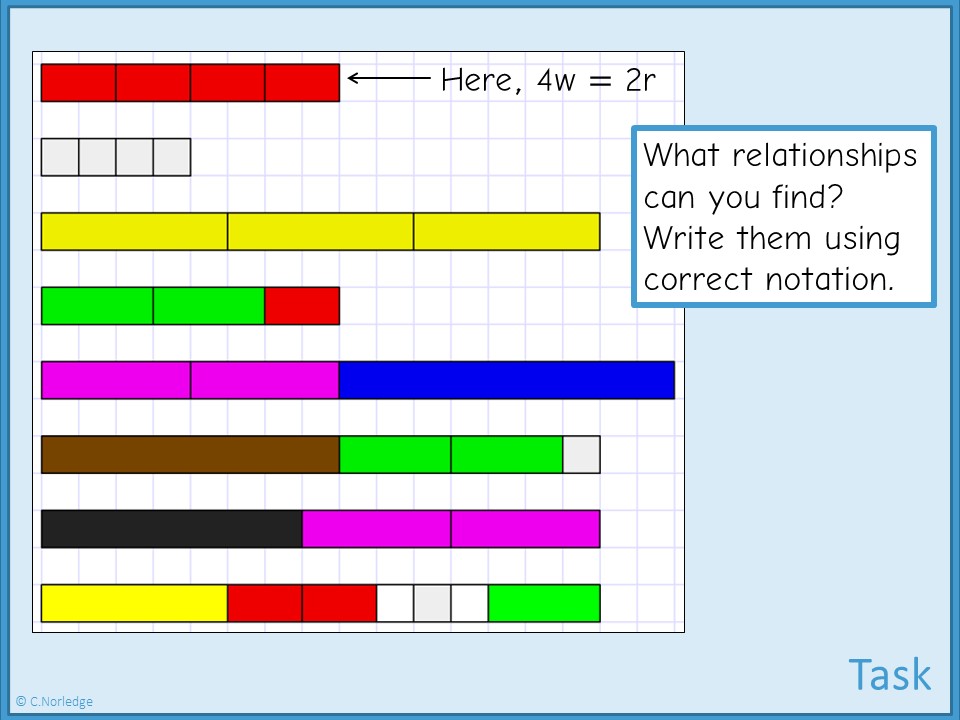
Today I’d also found a link to the Cuisenaire Rods manipulative on the NRich site, which is absolutely fantastic. I remember discovering a dusty old box of rods in the resource cupboard during my NQT year, digging them out and then not really doing anything relevant with them because I didn’t have a) the time or b) the experience to work out how to use them without just confusing the pupils more. I’d always been determined to go back and check them out properly though, particularly with the links to the work I’ve been doing with algebra tiles. ​Obviously the first thing you can do with them is just use them to illustrate multiplication as repeated addition and get pupils to have a play around writing expressions for these:
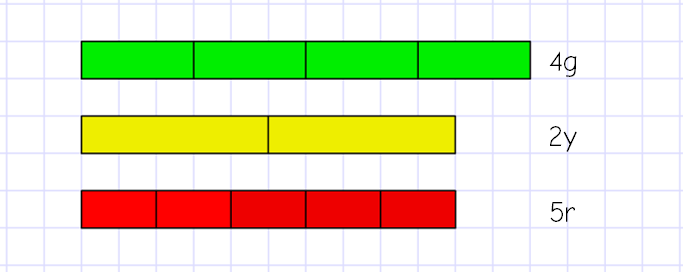
While making these examples, I realised how easy it is to accidentally create equations – from this picture, we have 2y = 5r and a visual link to y = 2½r. Similarly, there’s 2g = 3r, giving g = 1½r. Depending on how comfortable pupils are with fractions and inverse operations, you could delve even further into writing r in terms of y and g – but that’s a blog for another day, I think!

Stacking the blocks one under the other clearly links repeated addition, multiplication and area:
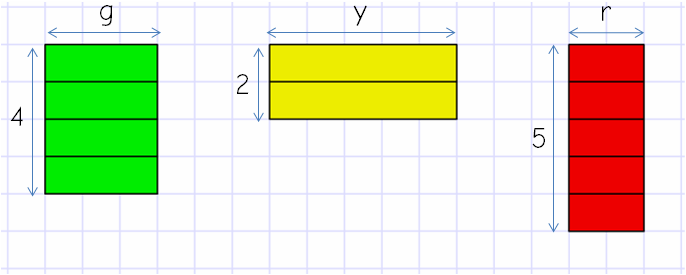
This can then develop easily to multi-rod (variable) expressions:
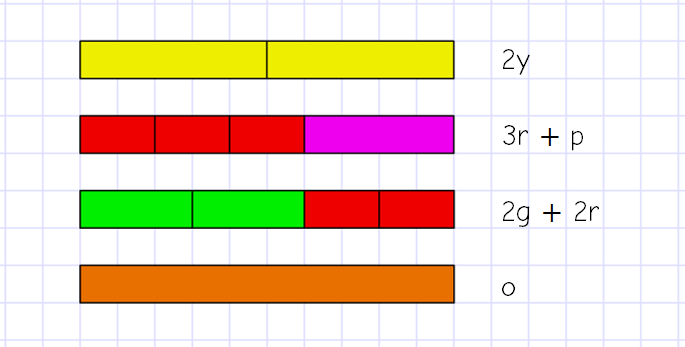
I’ve deliberately picked sets of rods that are 10 long, and I’d envisage that a further discussion about the equations we could make would happen in a classroom situation. Off the top of my head, you can spot 3r = 2g, p = 2r, 2y = o and then other relationships by picking fractions of one amount or another.

Unfortunately, without delving further into work on equations, you can’t really represent subtraction or division. Despite this, I think using the rods might be a great way into a topic that pupils find really difficult – I’d probably have a play with these for a couple of lessons before moving on to algebra tiles and introducing squares.

Also unfortunately, I am no longer at the school with the dusty box of Cuisenaire rods in the stock cupboard, and as far as I know we don’t have any kicking around anywhere at my current place, so I’ll be playing with the manipulative only. However, I am pretty tempted by this funky set of fridge magnets on Amazon…!

EDIT: I’ve now written a resource to test out when I get back to school; I’m probably going to leave the second slide to start with, as I don’t want to muddy the waters by teaching equations and expressions at the same time. 

(Image credit: By Celcom, CC BY 3.0, https://commons.wikimedia.org/w/index.php?curid=9511548)

Cuisenaire rods for algebraic expressions Read More »